Mylar embroidery designs have gained popularity recently as they’re a great way to add some sparkle to your next embroidery project! Rather than using metallic embroidery thread, using mylar embroidery designs is a more affordable alternative that adds a glitter-like appearance.
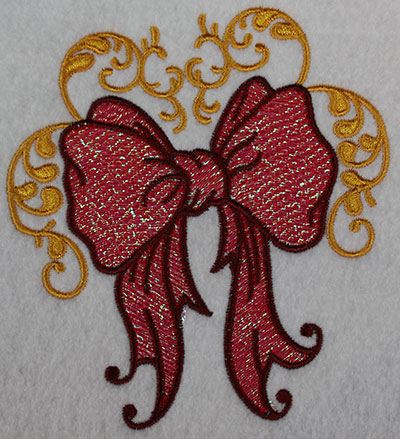
What are Mylar Embroidery Designs?
If you’ve never personally seen a mylar design, they are really a cool creative idea. Mylar is shiny & reflective; by putting a sheet of mylar into an embroidery design partway through the sewing process (much like an applique), more light reflects off the design & gives it a beautiful sheen.
Mylar itself is a shiny plastic film used for many things, not only embroidery. When purchasing mylar for embroidery, you want to buy the thin sheets. Do not purchase mylar balloons & try to use these for machine embroidery. It is far too thick & will not yield the same results.
Add a dazzling touch to your embroidery projects with mylar embroidery sheets.
The true beauty of using mylar is that in terms of color, it has a one size fits all approach. You don’t have to buy separate colors of mylar. Instead, mylar picks up whatever color of thread you’re using on top of it! This means that after initially tacking the mylar down, you can let your machine run without having to add in multiple pieces.
Are Mylar Embroidery Designs Digitized Differently?
Mylar embroidery designs are digitized with a thinner density specifically for the thin film of mylar to be added underneath the fill areas and allow light to penetrate between the stitches and create a beautiful glitter-like effect. Like an applique design, digitizing mylar requires a tack-down running stitch to hold the material in place.
That being said, you can embroider mylar embroidery designs without inserting a sheet of mylar however, you can not embroider a regular embroidery design with a piece of mylar.
Tutorial: How to Embroider A Mylar Embroidery Design
Trying any new embroidery technique can be daunting at first, but it’s almost always worth it! Remember the first time you stitched out an applique design? Follow the steps in this tutorial when sewing out a mylar design:
Step 1: Find a mylar design you want to embroider.
Click here view our collection of mylar embroidery designs now.
Step 2: Run your regular embroidery element until you reach the “Placement Line,” which will stitch a single running stitch outlining the shape for mylar placement.
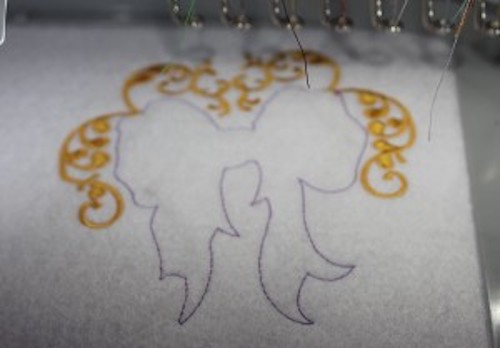
Step 3: Place one piece of mylar film over the “Placement Line,” use painter’s tape if needed to hold mylar in place.
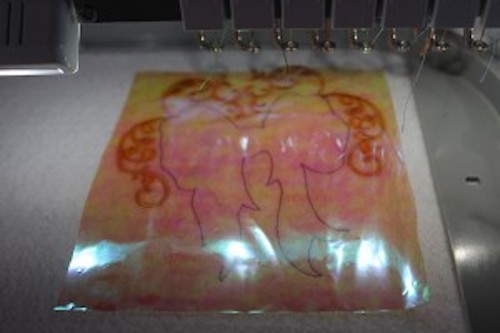
Step 4: Start your embroidery machine and stitch “Tack Down” single running stitch.
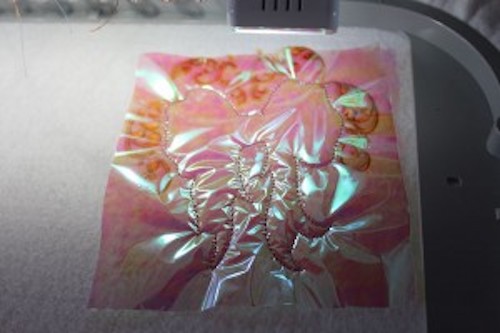
Step 5: Embroider all the loose-fill stitch elements on the mylar film.
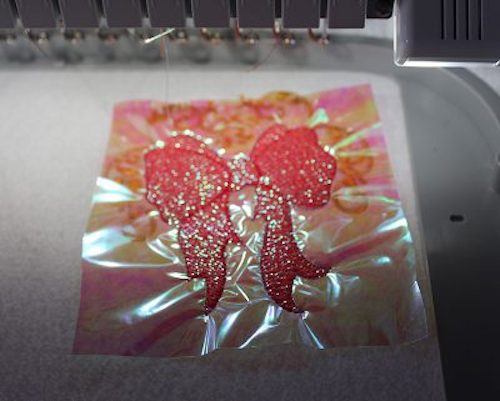
Step 6: Before embroidering the finishing outline stitch, tear away the mylar film.
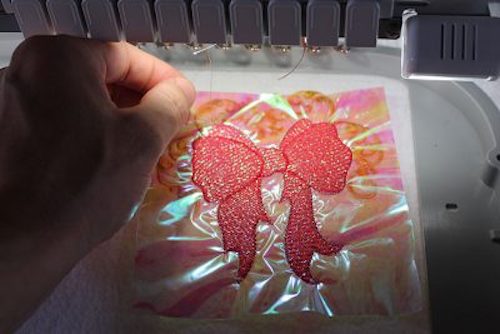
Step 7: Once the mylar film has been completely removed, embroider the finishing outline stitches within the design.
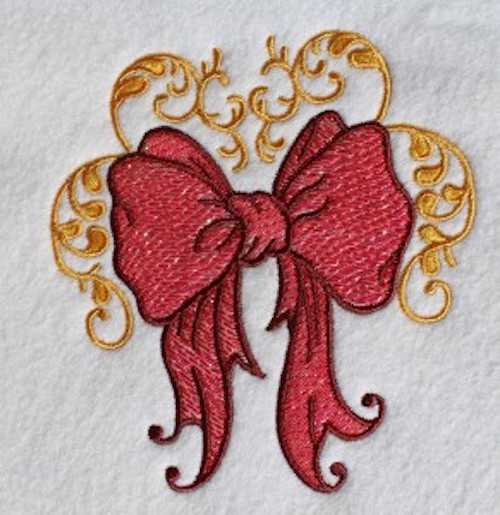
Need a visual on how to stitch out mylar? Join us in the video below, and we’ll walk you through it:
Can I Add Mylar To Existing Embroidery Designs?
One of the questions we often get asked regarding mylar is, can existing embroidery designs be edited for mylar?
The answer is yes! However, you need to determine if your editing time will be worthwhile.
To assess if it’s worth it, we highly suggest having both embroidery and digitizing experience. Also, having the native file format for the software you own will help determine how easily adding mylar can be done.
Check out our YouTube video below as John shows you how he edits a fairy design he digitized years ago to be able to stitch out perfectly with some mylar shine.
Tips when Embroidering with Mylar
- Don’t put the finished item in the dryer on high heat when embroidering laundered items with mylar. Laundering, in general, shouldn’t cause issues (except the normal wear and tear).
- Use quality embroidery designs that were digitized properly for mylar. Don’t forget to check out our large collection of mylar designs!
Now that you know about mylar try stitching out your own mylar designs! Let us know if this article helped you or if you have any questions… Happy stitching!
P.S. Never tried our designs before? Click here to download our free Embroidery Design Kit, which includes 11 fan-favorite embroidery designs.


Myler embroidery designs are really beautiful with such a natural way. we don’t really need some sort of metallic embroidery thread to do the job. And a great tutorial by the way. Thanks for a great blog
They are certainly beautiful 🙂 Thanks Chris, glad you enjoyed it!
Im a beginner and wanting to try mylar embroidery. This tutorial was absolutely amazing and so clear and with excellent instructions and pictures each step of the process. I am totally inspired and motivated to try.
Thank you for the excellent tutorial. Best one I’ve found yet
Thanks for your feedback Christine, we appreciate your support. Have fun playing with mylar & we’d love to see your creations!