Who has felt the agony… a $50 tactical polo you embroider for a friend rumpled, ruined. You tried to remove that stitching only to find holes that have replaced it. It’s fuzzy and snagged; you grab your iron to smooth out the mess, and the iron-shaped melted hole will now make an iron-shaped hole in your wallet until you find that there aren’t any more of these shirts to be had. That’s performance wear.
It’s delightful to pull on during a hot day so it wicks away perspiration and is soft against baby’s skin, but it’s prickly if manhandled when embroidered!
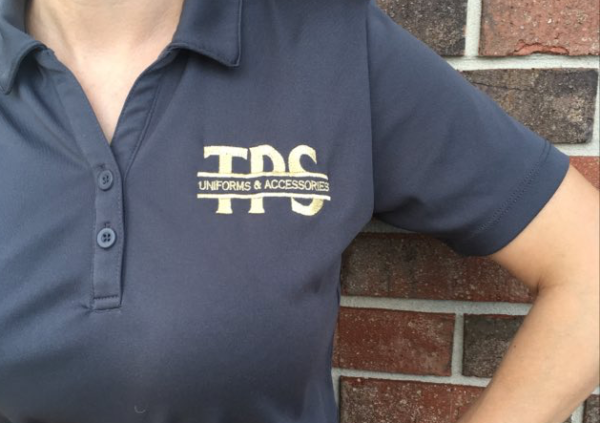
Performance wear can be anything from a child’s tutu to an Olympian’s leotard, a policeman’s tactical shirt, or a scuba diver’s wetsuit. They are clothing made from modern fabrics explicitly designed for an activity, climate, movement, or temperature. These fabrics can repel fire and stretch in every direction; they don’t snag or wick moisture. Amazing fabrics, right? Some will argue that they are amazing until you have to embroider on them, and then they don’t make us feel amazing.
Be sure to keep reason as we explore what some think are amazing fabrics and, to others, scary canvases upon which to embroider. We will talk about the fabrics, how they are handled, considerations for digitizing, machine speed, hooping and more.
What Does Performance Wear Mean?
Performance fabrics are textiles with waterproofing, stain protection, antibacterial and odor, flame resistance, body temperature cooling or heating, etc.
Many “performance” fabrics are created by applying a coating to an ordinary fabric or fibers before they are knit. While the coating idea is good at the start, the properties can diminish over time. You can apply some sprays or coatings such as water repellents later, but these will not be as effective as the factory-applied or embedded chemicals.
True “performance fabrics” are engineered textiles. They need to meet specifications for piling, wear cleaning, and fade. While chemicals play a part in the yarn composition, the knit or weave and the processing all go hand in hand with the performance-enhancing chemicals.
For the most part, performance wear is made of manmade materials. Here are five examples
- Polyester is very durable, but it does not breathe well and does not absorb moisture. It wears well but is quite uncomfortable in the heat or strenuous activities.
- Rayon is a synthetic fiber made from wood pulp. Despite being made of a natural product like wood, it is considered synthetic because of the chemicals required. It is very soft and often substituted for silk. Many embroiderers prefer rayon embroidery threads because of its sheen.
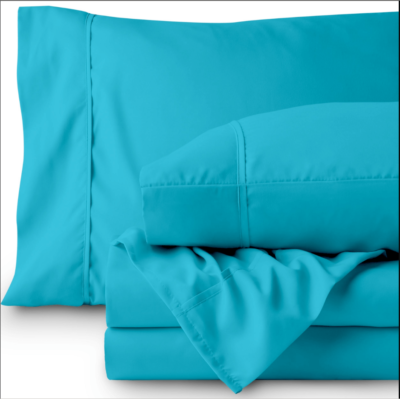
- Microfibers, as they sound, are incredibly thin and were first popular in cleaning cloths but have made appearances in bedding, clothing, and more. They are generally made of polyester and can be woven or non-woven. The yarn these fabrics are made of is often floss-like, small bundles of fibers that are twisted together.
- Spandex (Lycra) is a synthetic fiber that is capable of extreme elasticity. We find spandex everywhere, from undergarments to jeans. Any runners out there will know lycra or spandex blended leggings. Spandex is an anagram of the word expands.
- Acrylic fibers are synthetic fibers made from polymers. Often found in faux furs and fleece it has excellent insulation properties. Synthetic yarns for knitting are most often acrylic.
So who wears Performance wear? Performance wear is used in all walks and ages of life, and it would not be uncommon for you to monogram a newborn onesie one day and a tactical shirt for a policeman the next. You need to know what you can expect in these garments.
Weave vs. knit? Though the knitted material in a performance shirt looks like thread, it is still referred to as yarn. The yarn can be made of two or more strands that are twisted together. Twisting fiber imparts strength to yarn. It makes the fibers harder to pull apart lengthways and the yarn, therefore harder to break.
Yarn can also be made of floss. Just like cotton candy has thousands of tiny strands that make up its bulk, so does floss yarn. Take these strands and twist them slightly, or knit with them in a group, and you have yarn. There are pluses and minuses to this method; it wicks moisture but snags very easily. We will talk about strategies in just a bit.
Machine Embroidery Issues On Performance Wear
Many would say that you don’t appreciate cotton fabric until you embroider on something else. Woven cotton has a durable weave and tolerates embroidery well, but that same weave made with, say, rayon would be slinky and soft. Performance wear and embroidery do not always mix due to the weave of the fabric, fineness of the yarn, thickness of the fabric (such as neoprene), or treatments.
Here are some of the reasons you need to use caution when creating embroidered goods on these fabrics.
- Slinky movement – Textiles that are slinky are notoriously difficult to embroider on since they move and stretch while embroidered. This will cause distorted designs and puckering.
- More easily damaged – Manmade microfibers such as Tencel and dri-wicking fabrics can be embroidered, but if you make a mistake, removing the embroidery leaves damage since removing a few of the fibers in a piece of yarn causes fuzzing and marks.
- Susceptible to ironing – Ironing can help in applying backings or other stabilizers, but performance fabrics, because they are manmade, will melt under higher temperatures.
- Puckering – When we have seen puckering discussions from members in our Facebook group, the frustrated embroiderer has been attempting to embroider dense designs or larger designs on the double knit or polyester jumpers and sweaters with limited success. These will require attention and thoughtful consideration in design hooping and backing.
3 Best Tips For Embroidering On Performance Wear
- How To Hoop Performance Wear For Machine Embroidery
There are as many opinions on how to hoop as there are stars in the sky, so we will discuss the most reliable ways to hoop performance wear. It goes without saying, but how you hoop will depend a lot on the fabric.
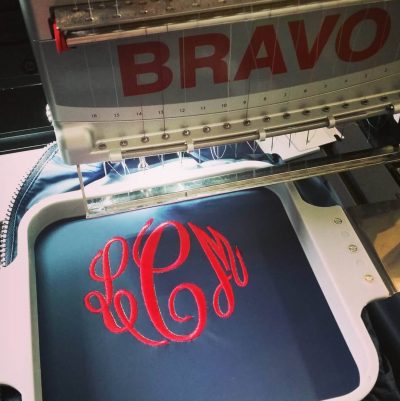
- Naturally hooping means laying the fabric down and letting it lay over the hoop and backing naturally without being stretched or pulled and without wrinkles or folds. When you stretch the fabric out and embroider a design locking it down to the backing and then release, the fabric around it contracts and puckers around the design.
- Very stretchy fabrics like lycra or slinky ones like microfiber or dri-wicking tencels could benefit from a light sticky spray designed for embroidery. We will talk about sprays a little later.
- Right size hoop – For many embroiderers, using a large selection of hoops is not possible. But the correct hoop can save a garment. Make sure you use a hoop slightly larger than the size of your embroidery.
- Square hoops provide good support for woven fabrics, and round hoops provide all-around support for knits and slinky fabrics. This is not to say you have to only use round or square, but they can aid in the quality of your stitch out. If you can only choose one shape due to cost constraints, the round is your better all-around choice since it provides all-around even support to the fabric.
- Floating – Floating is hooping a piece of backing and then laying down fabric for embroidery on top. This can work for small synthetic fabrics, but the slinky nature of the fabric when used in shirts and larger items floating can cause shifting of the garment.
- If you are floating to save money, keep in mind that this can be penny wise and pound foolish. If you get a poor stitchout, the new garment will be many times over the cost of the stabilizer you used.
- Toppers – Toppers such as water soluble stabilizer can really aid when embroidering on Tencel, lycra, and dri-wicking fabrics by lifting the stitching on the top and keeping it from sinking into the fabric. This supports the stitching and not having it rely solely on the weave or knit.
Want to learn more about hooping for your embroidery? Check out our Embroidery Hooping article for tutorials, tips, and tricks by clicking here.
2. Use Proper Stabilizer For Performance Wear
Wear it, don’t tear it!! – We keep hearing this because it is true! Tear-away backing is primarily composed of paper which is why it easily tears away from your stitching. It is heavier, and this stiffness is not comfortable against the skin. Of course, there are some occasions in which you will use cutaway but “wear it, don’t tear it” works as a rule.
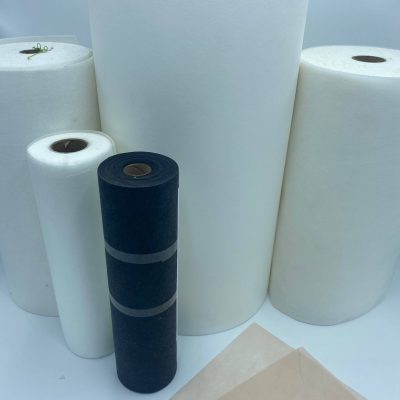
Performance stabilizer – Just as there are new fabrics, more and more performance stabilizers are on the market. We will not go into brands, but we will talk about several types.
- Bonded mesh stabilizers look like they came out of a waffle iron. A web of stabilizer fabric is made more stable by bonding a grid in it to remain soft and still provide support. These are often called “no show.”
- Directionally stable backing has a weave and is stable vertically, and horizontally it is perfect for names and lettering. It has a soft fabric feel but is woven in a way to provide support.
- Plastic films with sticky backing can be expensive, but they often can turn failure into success when working on difficult fabrics such as bags or hats. This is not suitable for garments since you are embroidering a piece of plastic that will remain and be scratchy.
- Spun Bonded backing is quite sheer and works well for slinky knits along with some light spray.
- Medium Cutaway in two layers is most often a good “middle of the road” option for those who cannot invest in many different kinds of backing.
- Iron-on stabilizer is meant to remain. Often a difficulty with using iron on is that the outline of your stabilizer can be seen from the front side. This is not always your best choice.
- Wash away stabilizer. Remember that a stabilizer is meant to support embroidery while stitching, but something needs to remain to support that stitching when you wear it. Washing away your support will leave crumpled, wrinkled embroidery. That said, wash away can be very helpful as a topper to support and loft the stitching until you get it out of the hoop.
Do you ever get confused which stabilizer to use for your embroidery projects and why? Click here for your Complete Guide to Machine Embroidery Stabilizers!
Here’s a quick video for our Embroidery for Beginner’s Course that’ll cover different types of stabilizers and toppings in more detail:
How many layers do I use? – You should only ever need one layer of stabilizer for a well digitized design, using two layers is usually compensating for poor digitizing.
Iron on – As we discussed above, iron on backing can help in some situations, but remember that on very slinky fabrics ironing on a square might stabilize a perfect square on your left chest embroidery, leaving the unsupported fabric around it to move and pucker. Also, keep in mind that some fabrics will melt.
3. How To Use Adhesive Sprays On Performance Wear
Adhesive sprays are slightly tacky and are designed to tack the fabric to the backing, but please do not rely on them to replace good hooping. When purchasing a spray, make sure to select one made for embroidery and not a craft or pattern tacky spray.
Embroidery sprays are meant to be temporary, and many of them absorb into the fabric over time and disappear. Using a craft tack or a sewing pattern spray will leave a residue not designed to wash away.
Remember that with adhesive sprays, less is more!
If you truly need more tack, lightly spray your backing, give a light spray to the fabric, and then stick them together. It is often helpful to turn the garment inside out, apply backing securing with pins if necessary, and then turn over and hooping. You never want the fabric to feel wet.
How to Digitize for Performance Wear
When embroidering soft, supple lycra, Tencel, or Spandex knits, you want to be gentle with them and create a design with that in mind. Some embroidery software have fabric assist tools, but these are not “fix-alls.” They adjust pull compensation, taking into account the contraction of the embroidery on the fabric but that is only a part of your toolbox.
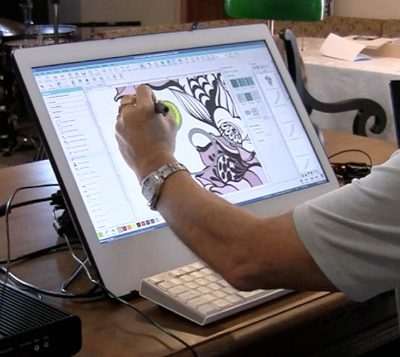
The easiest way to ensure success with performance embroidery is to use a design created to be soft and supple, but here are some other thoughts:
- Avoid bullet-proof stitching. Bullet-proof is just as it sounds. So dense and strong it would protect you from a bullet. It can happen with too many stitches, too dense of stitching, too many trims, and more. Not only can it make for a poor stitch out, but it can also damage your machine.
- Avoid a lot of layering. When layering portions of your design, remember that each object has an underlay and a stitching layer. So when you layer those four objects one on top of another, there can be eight layers of stitching. Removing underlay on layers over the original object can help.
- Large logos and designs – While you can do a full back on a slinky knit shirt, it may not be the best choice as you will have a supple soft front and a stiffer back.
- Simplify how to digitize embroidery – You have heard it said before in classes that the “brain fills in details” for the eye. Evaluate your design and ask yourself if you need all that detail. Often removing that will give you a better stitch out, and only you will notice. You can also substitute running stitch for satin, satin fill for tatami, etc. Want to learn more on the 3 primary stitch types in embroidery? Click here to check out our Digitizing Dream Course where you’ll learn to master these stitch types and create endless embroidery design possibilities!
- Use quality embroidery designs – at Embroidery Legacy, we offer close to 30,000 quality machine embroidery designs. Click here to view our beautiful embroidery designs to be inspired for your next embroidery project.
- Educate yourself on digitizing! – start with our free Digitizing 101 Cheat Sheet & Video Course by clicking here, where you’ll learn the basics of digitizing taught by the World’s Most Awarded Digitizer, John Deer.
Embroidery Lettering on Performance Wear
Lettering is tricky no matter the fabric, but keep it simple when working on knits and performance wear.
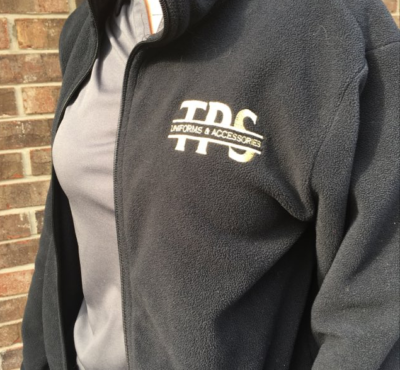
- Satin block letters are the best since they provide good coverage with the least amount of damage.
- Complicated lettering such as cursives with thin lines and tiny lettering will work but experiment with thickening up the lines by increasing pull compensation.
- As always, slow down your machine as that will help with keeping the fabric from moving during “recoil” between stitches.
Interested in learning more about how your embroidery machine speed affects your embroidered results? Click here to learn how fast your machine should go, how speed affects your projects, and other options for keeping up the pace and saving materials.
- Avoid many tie offs. Each tie off is a knot that does not always feel good against the skin when there are dozens. By properly digitizing and pathing, you can cut trims down to a minimum.
Want to learn about what pathing is? We’ll discuss how to avoid bullet-proof designs and the theory behind why pathing is important in your digitizing by clicking here.
- Use the correct needle! A “ball point” needle can help when working with performance wear. Ball needles separate the fibers as they pierce, and “sharp” needles can cut them. Especially with microfibers, this is a must.
So much engineering goes into this small little piece of metal, but using the right needle is crucial to producing great embroidered results. Click here to read all about embroidery needles, such as what needle to use for your fabrics and machine, learn the difference between types of needles, how to read a needle pack, and other most commonly asked embroidery needle questions.
Conclusion: Embroidering Performance Wear Doesn’t Have To Be Hard
Well, that is a lot to take in! Let’s recap what we discussed. When working with manmade performance wear we need to make considerations so that our embroidery turns out picture perfect!
- Properly hoop your item; naturally not stretched
- Use the correct hoop shape and size
- Use a ball point needle
- Choose carefully when picking backing and use at least two layers
- If you must use spray, less is more, and make sure you use a spray specifically for embroidery
- Consider your fabric when digitizing and do not rely only on program settings
- Use good designs from a digitizer with experience in the production of soft, supple designs with few trims
Happy stitching!
P.S. Embroidery digitizing is an invaluable tool for ANY embroidered looking to understand what’s really happening underneath your needle and how to interact with different fabric types. Click here and enroll in our Free Digitizing 101 Course today for a PDF cheat sheet and short video lesson lessons taught by the World’s Most Awarded Digitizer, John Deer!



Leave A Comment