Is your kitchen counter space getting cluttered?
Bread and buns can take up space, so why not make something to keep them tidy while adding some flair to your kitchen decor?

We’ve got just the thing! Keep reading below to make your own interchangeable fabric basket.
Why should you create this embroidered fabric bread basket?
Half the fun of making something is the ability to use your artistic talents and personalize it to whatever your decorative taste may be. Whether you want it to match your kitchen cupboards colors or to go perfectly with that Thanksgiving table runner you made last year, you can be sure it’ll fit perfectly with your kitchen decor. Not only can you create a fabric bread basket to suit your needs, but you could also make one as a thoughtful gift for someone else. This basket would be the perfect birthday gift for your mom or make a great housewarming gift for your sister’s new place. You could make it even more special and personable by including a special saying or their name on the bottom of the basket. Everyone needs to give a little flair to their kitchen, am I right?
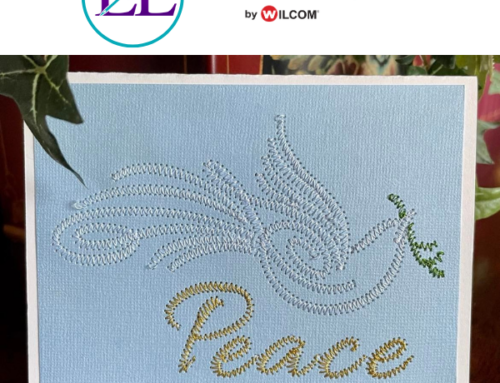
Want to get the best results possible with embroidery lettering? Check out our Complete Guide to Embroidery Lettering here. Or if you want to try industry-leading ESA fonts, you can download a free trial of Hatch embroidery software through us to get unlimited access to 101 ESA fonts for 30 days.
This bread basket is the most elegant way to serve your bread. Instead of having your bread and buns left in a hurdle in the corner of your kitchen counter (yes, I was guilty of this too), this is an elegant way to store and serve them. Although I love the idea of this fabric basket used for bread storage, its usage is not limited. Why not create a personalized fabric basket to store your Thanksgiving themed napkins for the middle of your kitchen table. Use it to serve your guest’s fresh homemade cookies, or keep it on your coffee table in the living room to keep your books and magazines tidy. As you use each basket for a different use, change your embroidery designs and fabrics to best suit its purpose.
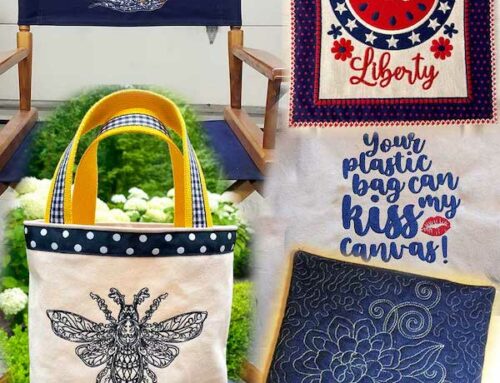
Now keep in mind, you don’t have to use this bread design for your basket. To really personalize your custom embroidered placemat, you can choose from our giant database of close to 30,000 quality embroidery designs, or you can create your design text or image with our free 30-day Hatch embroidery software trial!
This fabric bread basket is perfect for those wanting to stay on a budget (or really anyone who likes to save money). The materials are inexpensive, and some you may even have on hand. Dig deep into that fabric stash and see what you can use before purchasing more fabric. Remember, there’s no wrong way of what material or designs you use on this basket project!
Lastly, these fabric bread baskets are super easy to wash. Depending on which fabric you choose, you could just wipe off the surface with a cloth, or for a more thorough clean, undo the ribbons, rinse it in soapy water, and then hang to dry. Did I mention it’s also easy to store? With different seasons and different reasons to use this fabric basket, you may want to switch it out for a different fabric basket look. Simply untie the ribbons and lay it flat. Voila, easy to store and takes up very little space.
Supplies required for this embroidered fabric bread basket
- 1 piece of fabric 16″ x 20″ to fit large hoop
- 1 piece of fabric 14″ x 19″
- 1 piece stitch-n-shape or shape-flex 13″ x 18″
- 8 pieces of ribbon 16″ each
- Stabilizer (to decide which stabilizer is right for different embroidery projects, check out our complete guide to embroidery stabilizers)
- Iron
- Pins
- Embroidery designs for decor, we used:
- Sewing machine to stitch fabric (or if you’re feeling ambitious, just a needle and thread work too) -you don’t need a lot of sewing skills.
Embroidered fabric bread basket tutorial
Step 1: Decide on your choice of fabric & the design you want stitched to accent your bread basket.
Print the design template.
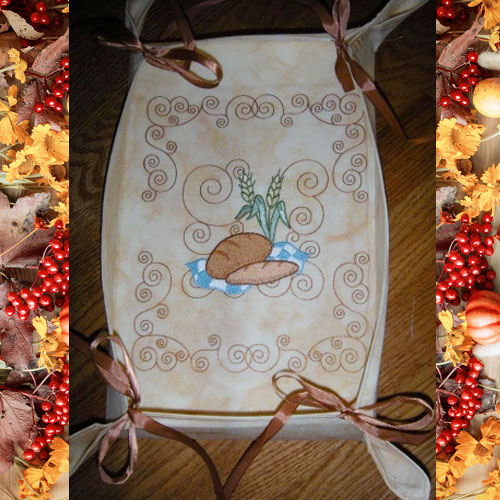
[For this tutorial, we used two loaves of bread, and corner swirls. Corner swirls were rotated within Hatch embroidery software to face the proper sides of each corner]
New to Hatch embroidery software? Click here for a free 30-day Hatch trial and try our Free Digitizing Challenge.

Step 2: Hoop your 16″ x 20″ fabric with the proper stabilizer.

Step 3: Stitch out your desired embroidery design(s).

Step 4: On your stitch-n-shape or shape-flex cut away a 2 ½ “square from each of the four corners.

Step 5: Trim the embroidered fabric to 14″ x 19″.

Step 6: Pin one piece of ribbon 4″ from each corner.
Stitch in place.

Step 7: Pin loose ends of the ribbons to your fabric so they don’t get caught in the seams.

Step 8: Place both pieces of your fabrics “front” sides together, like a sandwich where the designs are in the middle.
Stitch around only three sides of the fabric (you want to leave one side open so you can flip it inside out).

Step 9: Turn the fabric right side out and press with an iron.

Step 10: Insert stitch-n-shape or shape-flex into the unsewn side of your fabric.

Step 11: Sew the last opening of the fabrics closed.
Top-stitch along all the edges of your sandwiched fabrics.

Step 12: Fold each side 2″ inward toward the center of the fabric and press with a hot iron.

Step 13: Stitch along the fold line of the lower four sides to create the bottom of the basket.

Step 14: Tie the two ribbons from each corner together to create a basket appearance.
Store flat for easy keeping; putting the basket back together is as easy as tying the ribbons together again.

Conclusion: create this embroidered DIY fabric bread basket
With multiple uses, many different looks, and easy cleaning and storage. Why wouldn’t you make this fabric bread basket? Whether you’re looking to spruce up your kitchen, give a thoughtful gift, or create home decor on a budget, this is the right project for you.
P.S. If you want to give your embroidered fabric bread basket a different look, browse through our giant collection of machine-friendly embroidery designs. Plus, check out our Embroidery Legacy Design Club to learn how to save on our entire database of close to 30,000 quality designs. Or if you’ve never tried our designs before, click here to download our Free Embroidery Legacy Design Kit

Leave A Comment