Ready to take your Thanksgiving decor up a notch? These embroidered napkin holders are just the thing!
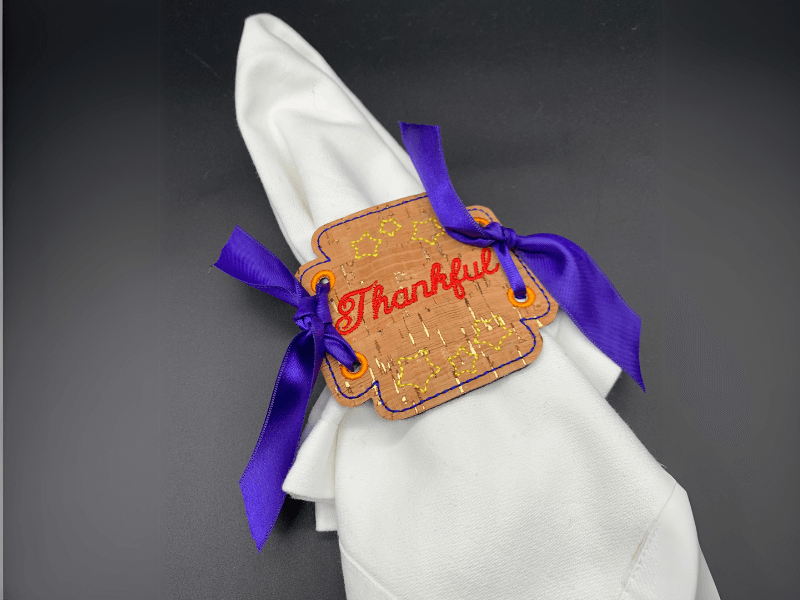
In this tutorial, I’ll walk you through creating these cute, ribbon-tied holders with the Design Doodler software. They’re a quick, stylish way to add handmade charm to your table and impress your guests. Let’s make this Thanksgiving extra special—your table decor is about to steal the show!
Materials for Napkin Holders:
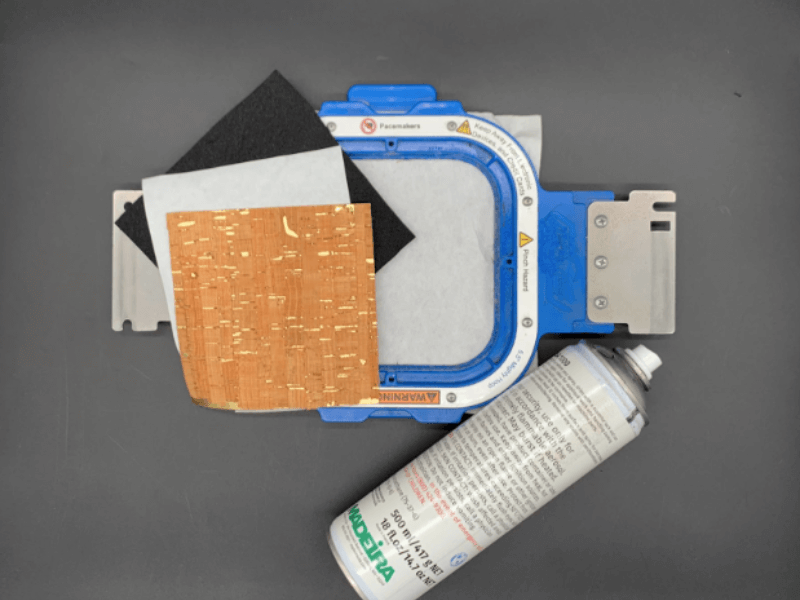
- One 5×5 inch square of vinyl (we used cork bonded for a rustic look)
- One 5×5 inch square of felt for backing
- One 5×5 inch square of heat bonding material- we used Heat ‘n Bond
- Temporary embroidery spray
- Decorative ribbon
- Design Doodler
- New to the Doodler? Give the free Design Doodler demo a try, and start creating your own embroidery designs! While you won’t be able to stitch them out, it’s a great way to explore all the features and get a feel for what’s possible. Includes 5 video lessons!
- Artwork, download this file blow
Creating Embroidered Thanksgiving Napkin Holders on the Design Doodler
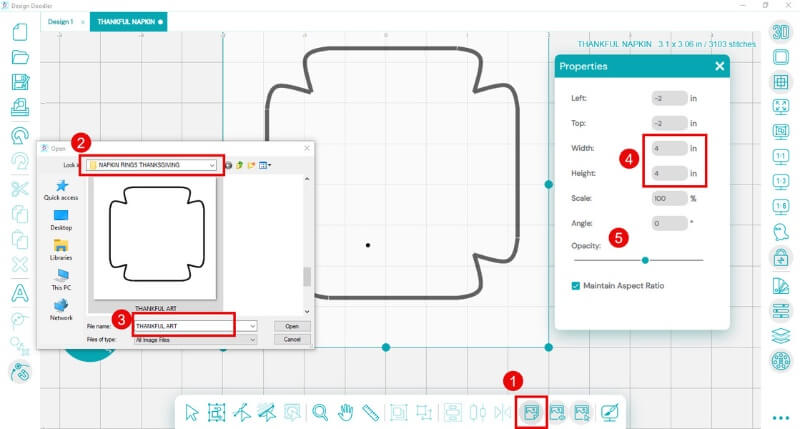
Insert your artwork
- Select Insert Backdrop tool
- Navigate to your file location
- Choose the artwork file
- Open the Properties tool
- Resize to 4×4 inches
- Adjust the opacity if needed
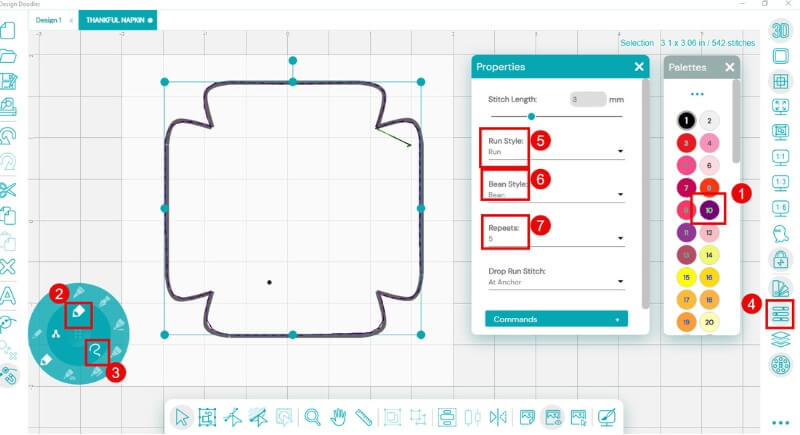
- Choose your color from the color palette
- Select the Run Bean stitch brush
- Choose the freeform draw tool
- Open the properties tool
- Run Style: Run
- Bean Style: Bean
- Repeats: 5
-
-
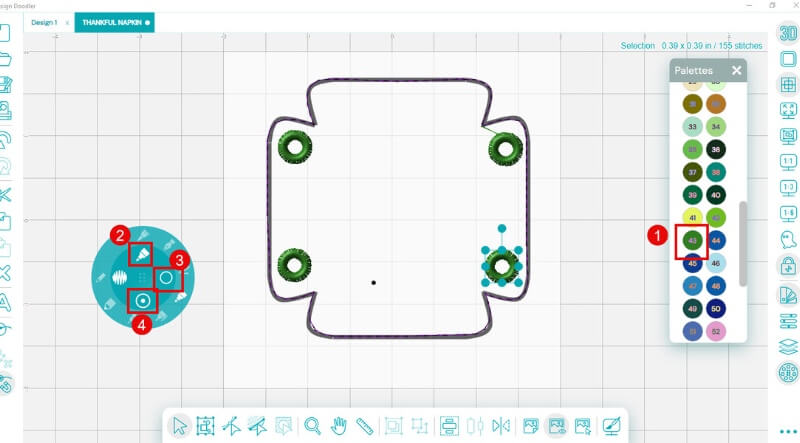
- Choose your color
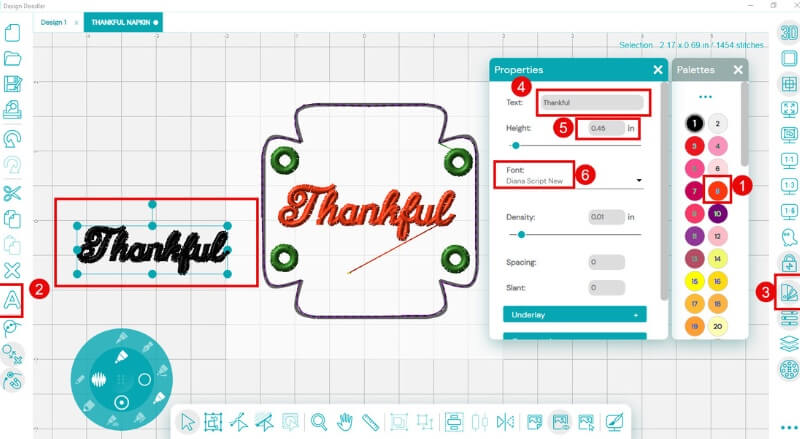
- Select the Steil (satin stitch) stitch brush
- Choose the Circle tool
- Select the 2.5 mm width option
-
- Choose your color
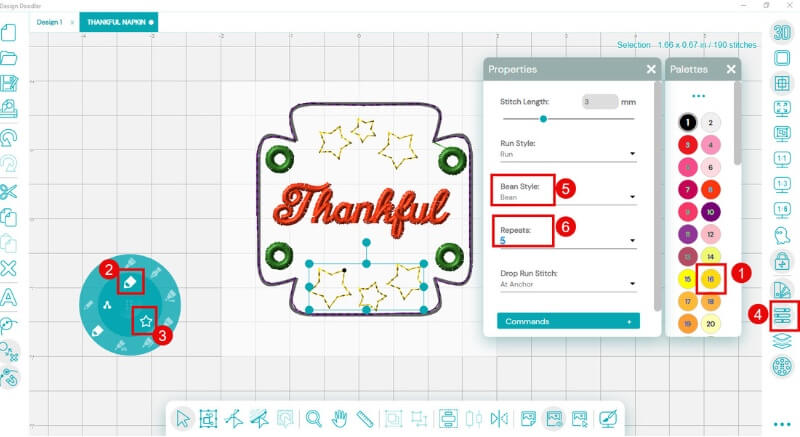
- Select the Lettering Tool (a box which says “Text” will pop up)
- Select the Properties tool
- In the TEXT box, enter your text
- Resize to 0.5 inches
- Select your font
-
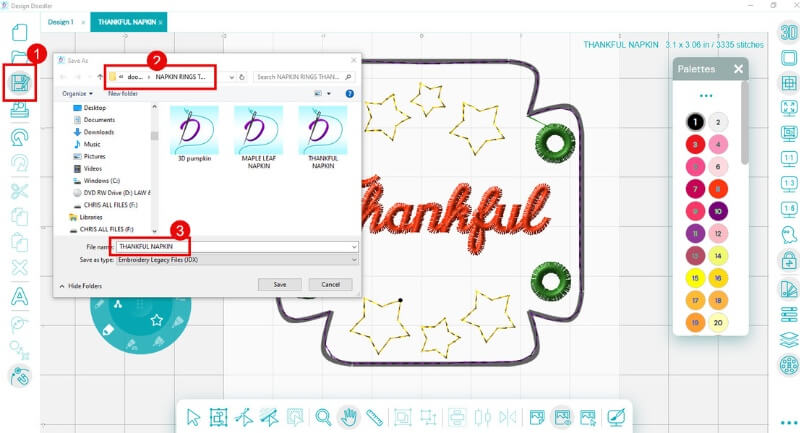
- Choose your color
- Select the Run Bean brush
- Choose the star-shape
- Open the properties tool
- Bean style: Bean
- Repeats: 5
- Select the Save File tool
- When the navigation box opens, navigate to the file location
- Name your file. Save as a .jdx (native) file and repeat this process, saving it as a machine file for your machine type.
Embroidering A Thanksgiving Napkin Holder
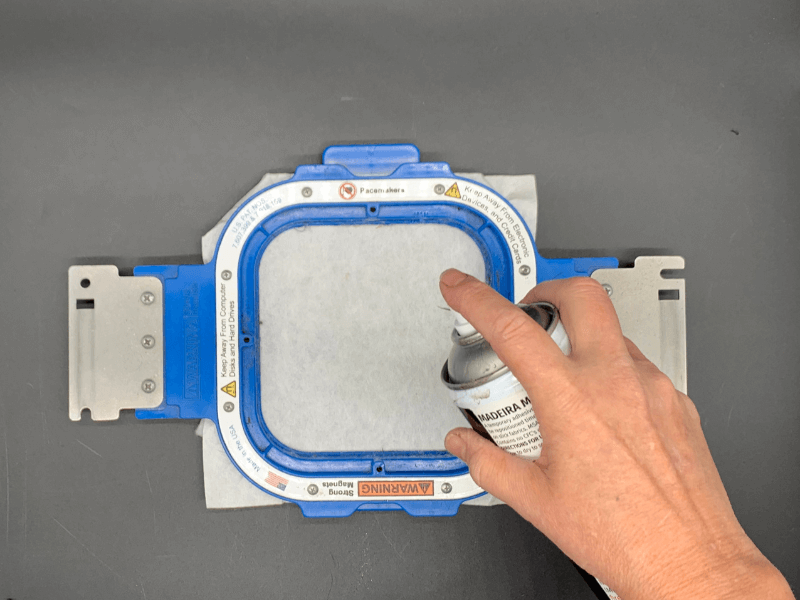
Step 1: Hoop a piece of cutaway stabilizer and lightly spray it with temporary adhesive spray.
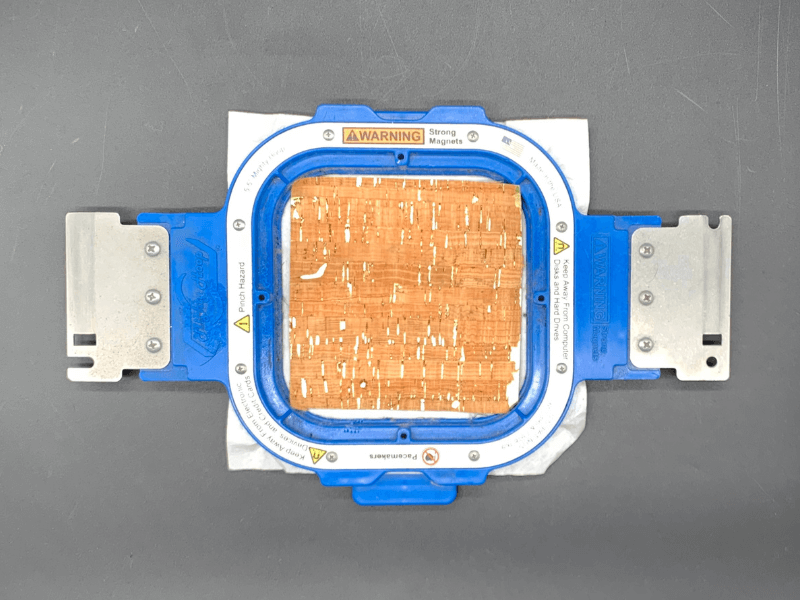
Step 2: Lay the cork or vinyl in your hoop.
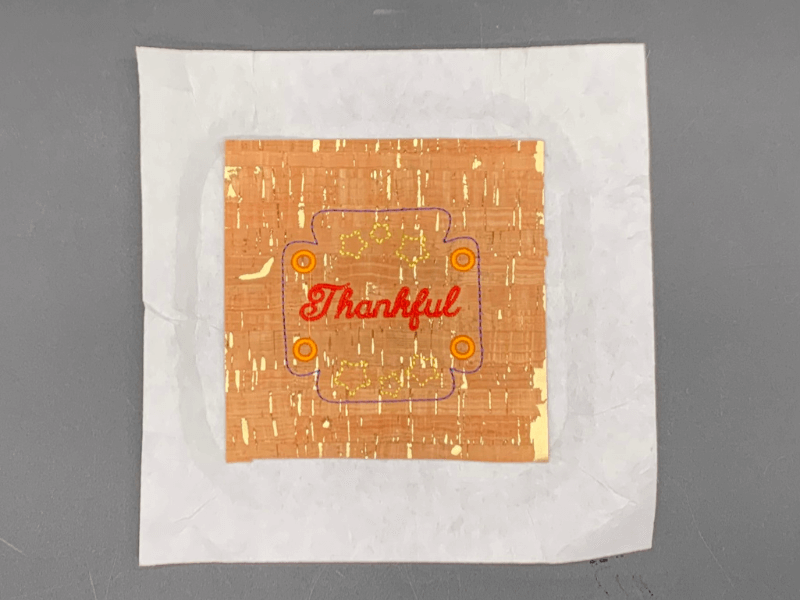
Step 3: Insert into the machine and stitch. After stitching, remove from the hoop.
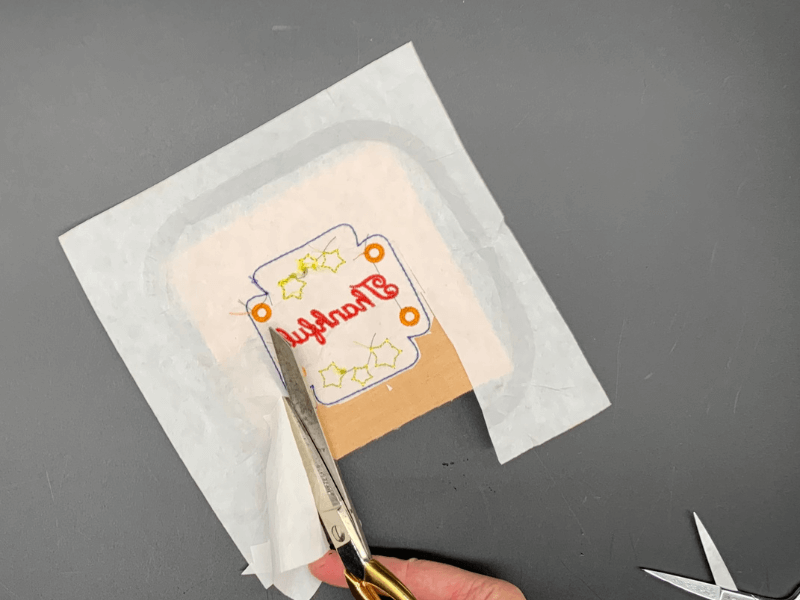
Step 4: Trim ONLY the cutaway stabilizer as close as possible without clipping the stitching
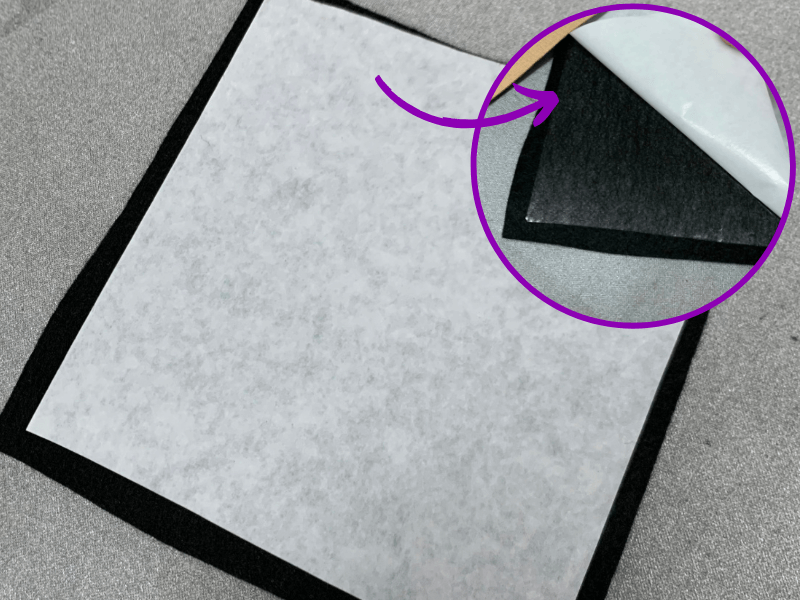
Step 5: Prepare your felt by bonding the fusible bonding to one side.
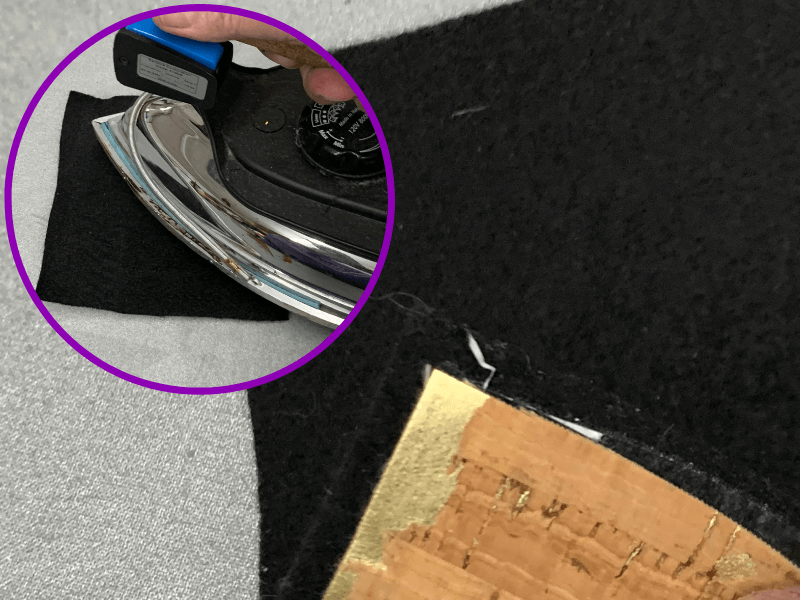
Step 6: Iron the felt to the vinyl or cork.
Note: Iron from the Back (felt) side so you do not damage the surface of the vinyl or cork.
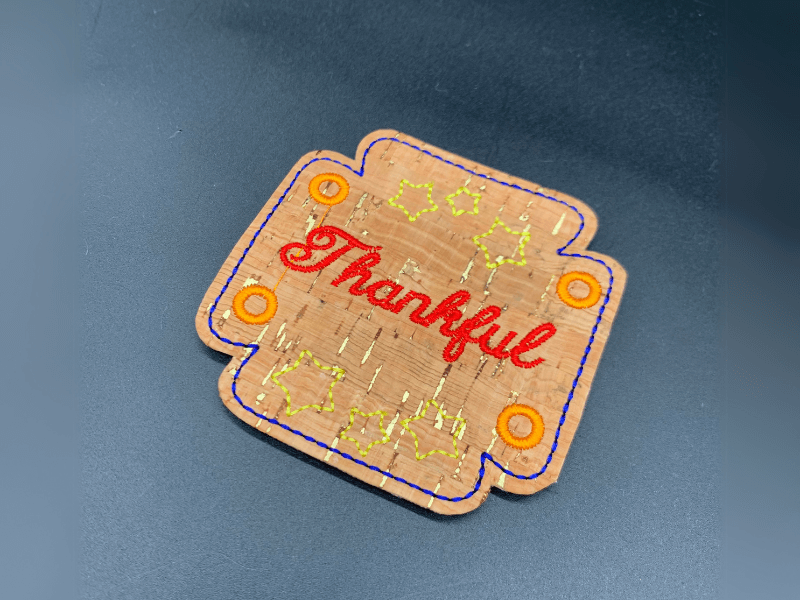
Step 7: Trim your embroidery.
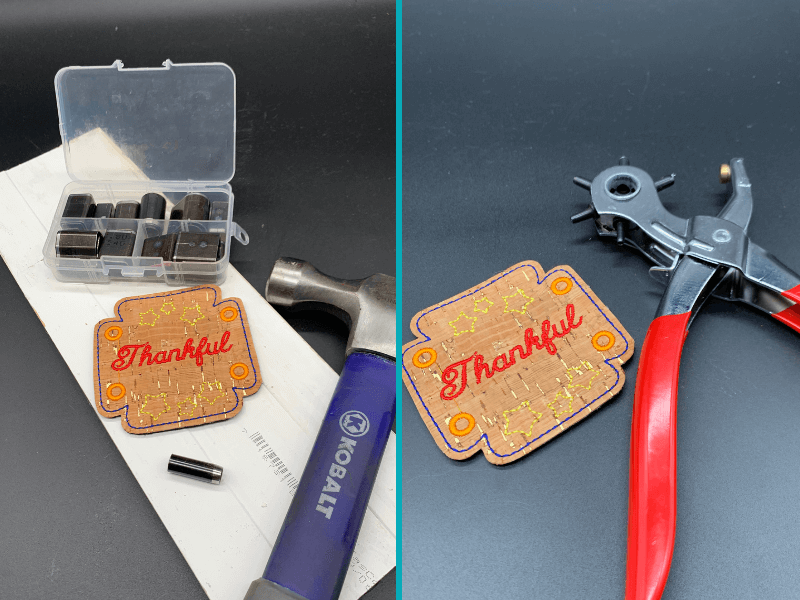
Step 8: Punch your holes (it is easiest to use a harness punch, found at hardware stores).
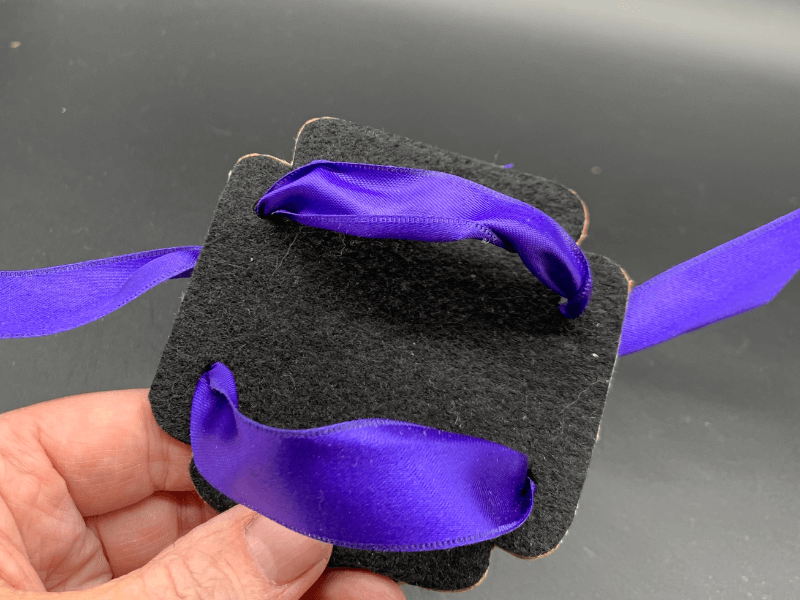
Step 9: Thread ribbon through the holes for use.
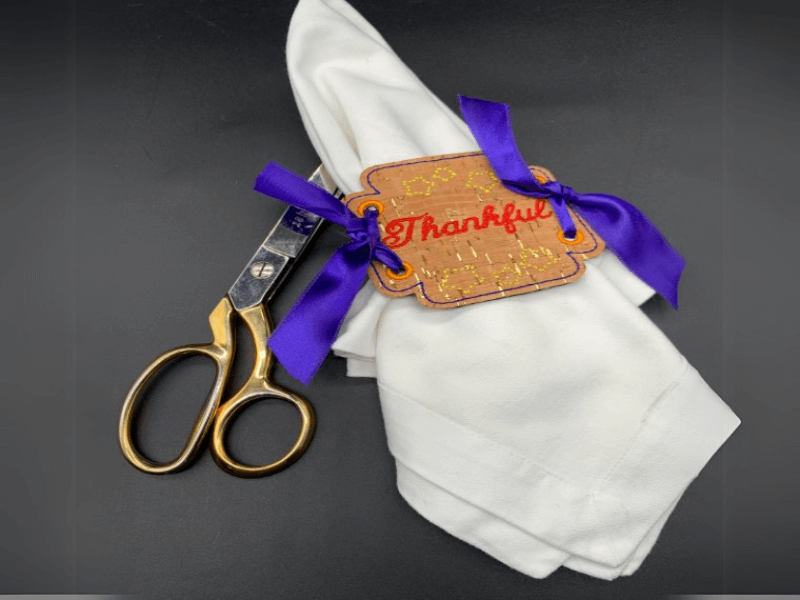
Step 10: Place your new napkin holder around your decorative napkin.
And there you have it—your own set of charming embroidered napkin holders, perfect for Thanksgiving! These little touches bring a personal and festive feel to your table, and they’re bound to be a hit with your guests. Plus, the versatility of the Design Doodler software means you can easily customize the designs to suit any holiday or theme.
If you haven’t yet, don’t miss out—try a free demo of the Design Doodler software to see how easy it is to create your own personalized designs!
If you create this project, we’d love for you to share it with us in our Facebook Embroidery Design Doodler Software Official Group.
Until next time, happy doodling!

Leave A Comment