Embroidering on terry cloth falls into one of the “unique” categories that, like any application in embroidery production, should not be an issue of difficulty if the proper steps at the digitizing level have been carried out.
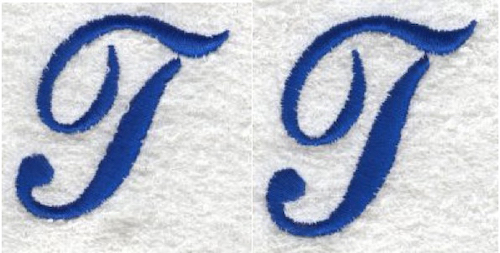
An embroiderer needs to follow a few basics if they expect to produce quality goods on this type of fabric. We’re here to help clarify these basics!
I’ll have you know I tried hard to think of some way to make this article a little light-hearted and not just a technical manual, so I might as well apologize in advance as it’s best suited for all us embroidery geeks. But on the plus side, after reading this article, you’ll leave with a better understanding of proper pull compensation, the suitable underlay, and a few suggestions to create the perfect design for embroidering on terry cloth.
Basics For Digitizing On Terry Cloth
There are a couple of basic rules to follow for those who have not yet experimented with terry cloth at the production level.
- Most will agree that using Rayon thread over Polyester is preferred for embroidering on terry cloth regarding both run ability and the lifespan of the embroidery itself.
- Using solvy, a water-soluble plastic film, allows much more detail to be seen on designs and is a must at the production level.
- For the most part, a tear-away backing is advisable to provide needed stability for your design. Still, cut-away and solvy can also be used as backings in certain circumstances.
Want more tips on how to embroider on terry cloth towels? Click here to learn how to monogram your towels, learn what size designs fit best and correct placement, learn how to stabilize your towels properly, and for ideas on how to make towels into a gift for a variety of different occasions.
How to Digitize Designs for Towels and Terry Cloth
Over the last few years, as the popularity of both single-head and home embroidery machines have hit the market, individual personalization of products using monogramming and keyboard lettering name drops has quickly become a popular and profitable market.
Tips When Digitizing Terry Cloth
Purchasing lettering and editing software have become an industry standard, and terry cloth requires specific values that won’t apply to most other fabric types. These values include:
- Density on your column and fill stitches will need to be increased by about 10% to 20% from standard goods.
- Increasing pull compensation values is needed to counteract the thickness and pile of the fabric. The amount of pull compensation should increase incrementally as the thickness of the columns does.
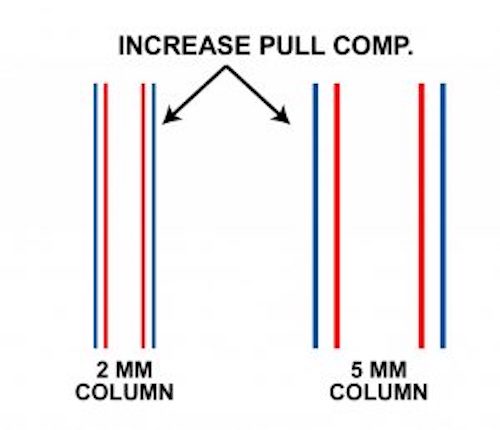
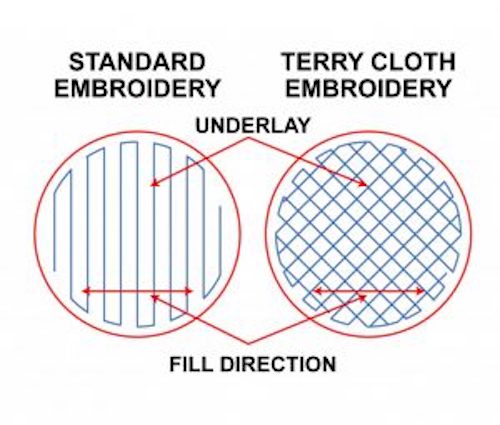
3. Zig-zag underlay, even for smaller lettering with thin columns, is advisable to help mat down the terry cloth and not allow the underlay to fall outside the column stitches. Thicker columns over 3mm can use both edge run and zig-zag underlay types. The edge run will help maintain clean edges on your columns.
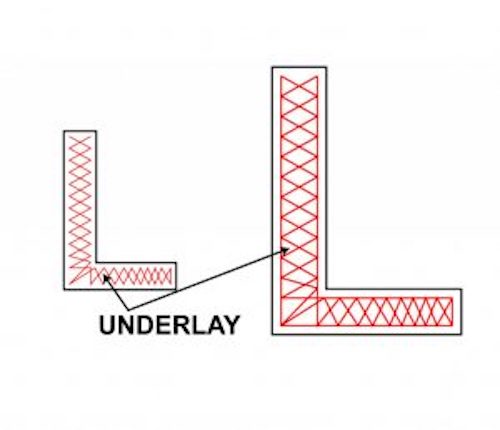
Underlay When Digitizing Terry Cloth
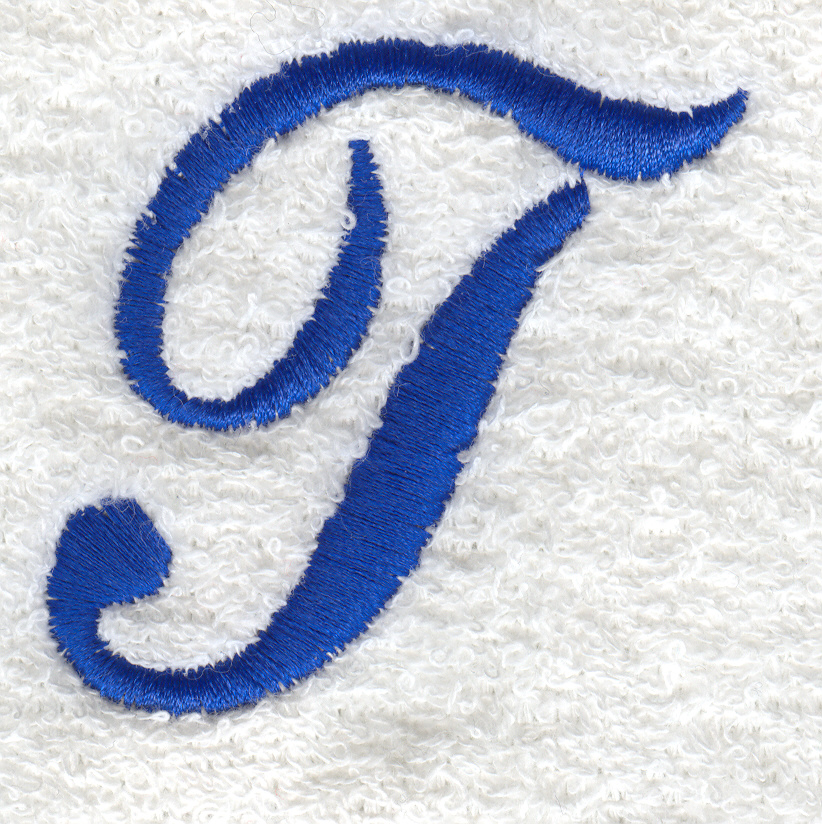
Another way to add an extra dimension to your monograms, embellishments, or elements of your corporate designs is to build up the underlay to create a bit of a three-dimensional effect on your column stitches. It is a very visually effective technique.
However, creating this three-dimensional effect is also more time-consuming as all of your underlay needs to be built up manually. The general idea is to use it on thicker columns that are at least 4mm wide. You start by building up multiple runs on underlay towards the center of your column areas. Be fairly excessive as this is your “cording” so to speak that is going to push up your column stitches. Next, you will manually place zig-zag stitches that run slanted on a 45-degree angle on the first pass and opposite in direction on the second pass creating a webbed effect that holds in all of the centers runs underlay that you placed down first.
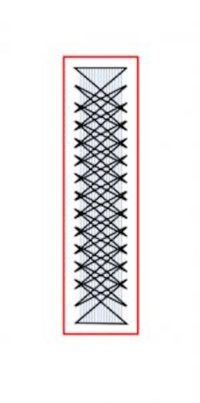
Now when you place your satin column stitch over the top, you’ve created a convex ridge of underlay that forms more depth. When using this technique, try not to get too far ahead of yourself before following up from your underlay with your columns. There might be some movement in the design if you do, and the underlay could start popping out.
Getting creative with this technique within corporate designs can have dramatic effects if you choose your design elements correctly.
Digitizing for terry cloth does pose a few challenges. The same values that apply to settings regarding density, pull compensation, and underlay needs to be followed when custom digitizing.
Also, fill stitches will need more stability within the underlay by using cross-stitched underlay instead of the standard opposite direction underlay.
Fixing Embroidery Designs for Terry Cloth
Corporate designs already digitized are many times embroidered on terry cloth as an afterthought. Luckily, software being as it is today, we can easily and quickly modify the values of these designs without having to re-digitize them. We seem to run into some real difficulty when the design elements consist of much fine detail and small text.
Here are a couple of “easy fixes” when you find yourself in this situation.
Fill Behind Your Design
The first thing we usually try is incorporating a 1/3 fill the same color thread as the fabric.
Place this fill either behind the entire design or just behind the details or text that embroiders directly onto the fabric. This fill is to be digitized with no underlay values and should only include a tie-in and tie-out function. Because it is simply a loose fill it won’t add many stitches to your design and will assist in matting down the pile of the terry cloth for your lettering to sit on top.

Create Applique Background
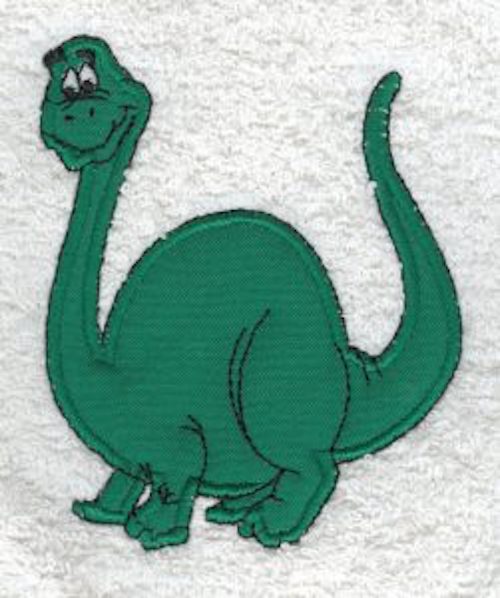
The second option we used when embroidering designs was creating generic appliqués shapes in various sizes and running the designs on top of the appliqués.
Cataloging circles, ovals, squares, and rectangles in various sizes can translate into quick edits that will work for most logos. This solution is a little more time-consuming and costly for your customers, but the results are embroidery quality that resembles work done on standard materials.

One thing to watch for is that you make sure your material blends are fairly consistent. If your terry cloth is 100% cotton, follow suit with your appliqué fabric to try and minimize varying shrinkage with the differing materials.
Appliqués on terry cloth also work well and are more cost-effective when embroidering decorative projects are geared more towards the retail market. Stitch counts remain lower while resulting in more coverage area, especially since more density and underlay is needed when embroidering fills directly on terry.
Now for a tip that fringes on the creative side and can still be used within the corporate market. We used this technique while running single-color designs, mainly on beach towels. However, it can be done on anything terry cloth, including golf towels.
First, you need to hoop solvy within your frame instead of pelon and then wind your bobbins with the same thread color as the front. Obviously, it works best with embellishment designs and symmetrical logos that are reversible, but even when a design doesn’t hold these attributes, it still gives the embroidery a finished look on the reverse side.

Creating loose-fill designs specifically for this technique generally works best because of the lack of stability by not using the typical backings. On the other hand, once the solvy dissolves away, it tends to lend itself well to the intended purpose of being functional and absorbent.
Conclusion
Digitizing for terry cloth is easier than you thought with the use of these proper techniques and tools. Remember to increase your density, increase your pull and push compensation, and adjust your underlay.
If you need to adjust your design for embroidering on terry cloth, remember our three simple tips:
- Use a fill behind your design
- Create an applique background
Mastering your skills with this seemingly difficult medium and becoming more creative and experimenting with different techniques will quickly expand your involvement in creating your personalized embroidery for terry cloth and towels.
Follow our suggestions and tips above for the best results. If you enjoyed this article or have a question, don’t forget to leave a comment below.
Happy stitching!

Thank you for the information about Terry cloth.
Very useful and good information. I wil use it with my digitizing.
Lucienne
My pleasure Lucienne, happy to help!
Thank you very much for this super article. I particularly like the idea of doing the fine embroidery on an appliqué area.
Some of the images are not loading properly, e.g. satin pic 4. I’ve tried in a couple of browers with the same result. Could you check, please, as I’d like to see them?
Thanks for letting us know Katharine, images have been re-uploaded.
Enjoy!
Thank you.
Our pleasure Catherine!