Many embroiderers struggle with stiff “bulletproof embroidery” when using auto-digitizing software. You click auto-digitize and expect the design to come out close to perfect, but that is rarely the case.
This is not because the software itself is flawed, but sometimes it needs the help of an expert – you. For those looking to expand their skills and knowledge of digitizing and take your embroidery to the next level, this article is for you.
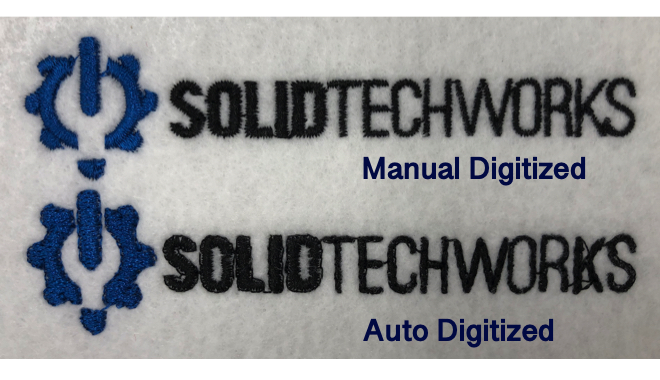
We’ll explain auto digitizing vs. manual digitizing, when it is appropriate to use them, and what you can do to improve your use of both. First, let’s cover the basics.
What Is Auto Digitizing with Embroidery Software?
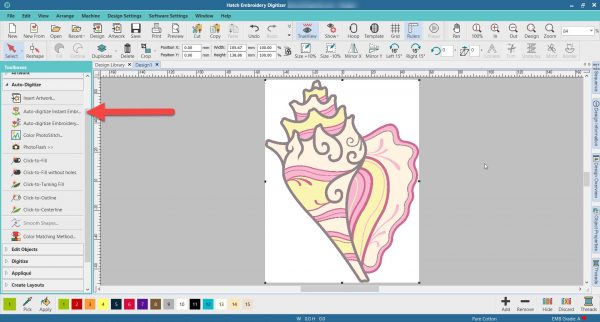
Embroidery auto digitizing software uses computing to capture graphics/design images and translate them into machine embroidery design files. The software will decide on the appropriate layers, stitch counts, colors, and more, based on the algorithms it uses to digitize a logo or graphic.
Auto digitizing is used to save time and effort, but in doing so, it can cause structural problems with your designs. This is especially true when auto digitizing more complex designs (we’ll get to this shortly).
What Is Manual Digitizing with Embroidery Software?
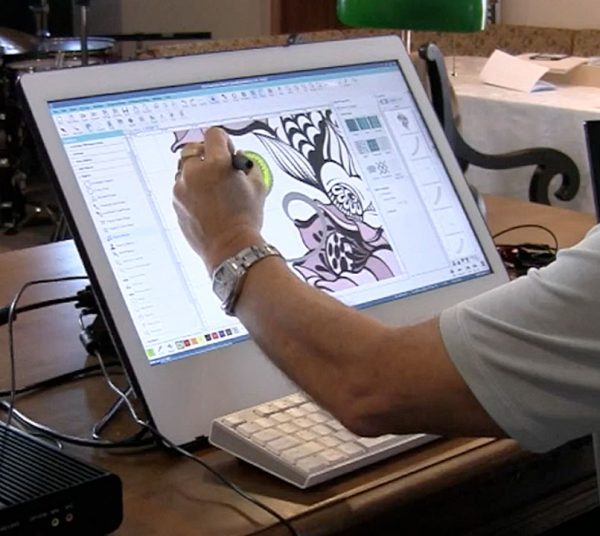
Manual digitizing is when the embroiderer uses embroidery software to manually translate an image or design into embroidery. The embroiderer gets to choose how the design will stitch out, in what order the layers will come together, stitch angles, and which colors to use.
Learn more with our full article on What is Embroidery Digitizing?
Embroidery auto digitizing software can be great if used correctly and perhaps on simpler graphics, supplemented by manual digitizing skills. Manual digitizing skills always go a long way to help you get the quality results you want.
Does Auto Digitizing Embroidery Software Work?
Yes and no. It depends on the complexity of the logo and graphic used and the operator’s skill. In the hands of a novice who doesn’t know better, embroidery auto digitizing software will seem to work wonders, but in the eyes of an experienced digitizer, the problems with some auto digitizing work couldn’t be more obvious.
Auto digitizing software does what it’s meant to do, but sometimes it doesn’t do things in a logical order or in a way that will translate well to embroidery. The software takes what it sees in the order it was presented, and digitizes it. It’s not capable of distinguishing the best angles or fills for a cleaner design. That’s your job.
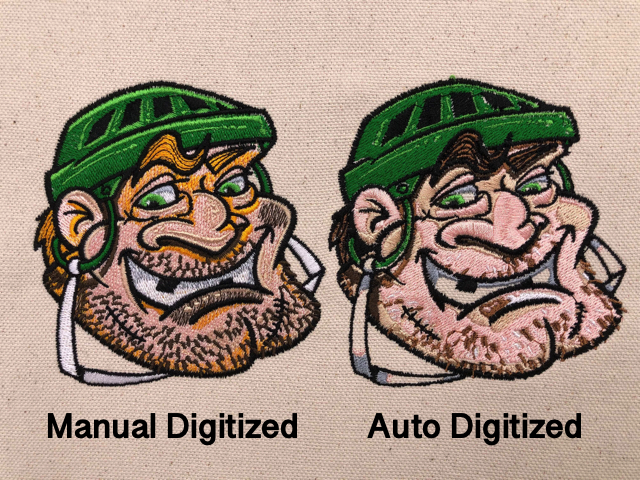
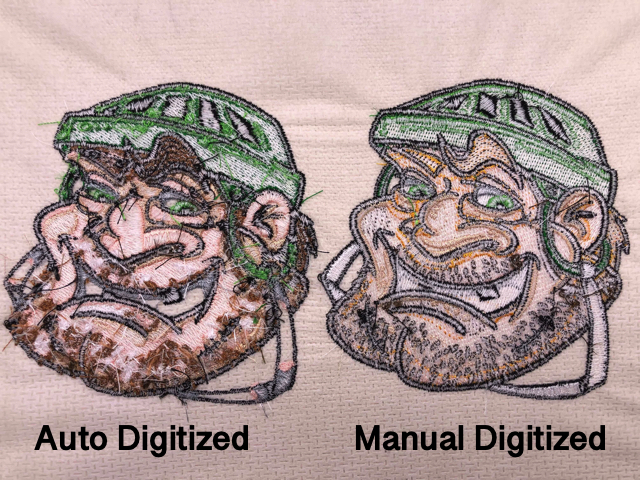
Unfortunately, auto-digitizing isn’t exactly AI powered yet. Notice all the jump stitches and trims in the auto digitzed designs above. That leads to thick “bullet-proof” embroidery, thread breaks, and more time/frustration running the design on your machine.
Check out our YouTube video below as CEO of Embroidery Legacy John Deer goes further into detail comparing auto digitizing to manual digitizing. Watch as John corrects an auto digitized design:
What if I use High-Quality Images with my Auto Digitizing Embroidery Software?
Good images will usually yield better results when hitting “auto-digitize,” but that’s not always the case. Even if you use a vector file format – a file that contains proper nodes, formatting, and resolution – it’s not always optimized for machine embroidery.
When an artist creates a design in CorelDraw or Adobe Photoshop, they don’t consider that the design needs to be embroidered in a specific order or sequence that only a machine embroiderer would understand.
Remember, embroidery is a physical medium whereas print is flat and doesn’t need to take into account layering.
The embroidery software will auto-digitize the design based on the layers the artist created in their graphic software, which might cause excessive stitch counts, incorrect push and pull compensation, too many jumps and trims, and image distortion.
Manual digitizing is a great skill to have when working with images you’d like to turn into stitches. It allows you to adjust, improve, and correct your designs. You’ll ultimately create a better piece, with less time spent fixing mistakes.
Watch our YouTube video below to learn more about using vector graphics to automatically digitize a design.
Should I Learn How To Digitize Embroidery Designs?
The answer is yes. You don’t need to become the best digitizer in the world. You just need enough skills to make your job easier and your work better. You’ll find plenty of ways to use manual digitizing skills to save you time and hassle.
If hitting “auto-digitize” isn’t getting you the result you want, and most of the time it won’t without tweaking, there’s a good chance that digitizing it yourself or at least knowing how to fix the auto-digitized design with manual digitizing knowledge will help you achieve the results you want.
However, correcting auto-digitized work can take hours. Complex designs that are auto-digitized will require lots of editing to get a good result with your machine. You’ll have to adjust the image node by node, stitch by stitch, to not make it production friendly. The alternative is to digitize it yourself, using your image as a template. Believe it or not, in most cases, this is a much faster way to generate quality results.
Watch our YouTube video below as John compares semi-automated and auto-digitizing tools to compare the results. Regardless of what tool you choose, to ensure quality results it will require editing the embroidery design file.
Which Graphics Software Should I Learn?
None! You should learn to use embroidery digitizing software. When importing images or graphics into your digitizing software, you’ll be adjusting nodes and creating your own graphics within the software anyway for machine embroidery.
There’s no need to learn graphics software to then import the image into a digitizing software and adjust it or re-digitize it all over again. It’ll save you stress from learning good digitizing software and creating your designs at the source, where any other graphic or file would ultimately end up.
Take Your Embroidery Skills To The Next Level
We want you to become a great embroiderer, and to do that, you need to focus on developing the right skills. Having manual digitizing embroidery software knowledge is a must. We wanted to address embroidery auto-digitizing software to bring to attention that it’s a far cry from a be-all-end-all solution. If you’re going to become a skilled professional, learning to digitize is the way to go.
Check out our Free Embroidery Digitizing 101 Cheat Sheet & Video Course. It’ll teach you the essential theory that EVERY embroiderer should know to help you get the best embroidered results possible (whether you want to create your own designs or not).
The Digitizers Dream Course

We are offering a course to supplement our excellent free resources. Imagine being able to digitize your own designs in minutes and with confidence. You can take graphics or designs, and instead of settling for “auto-digitize,” you can do it yourself.
The Digitizers Dream Course is designed to hold your hand every step of the way and get you past the learning curve quickly. There’s here’s nothing else quite like it in the industry and it’s taught in the major reputable digitizing brands. Having taught tens of thousands of embroiderers how to digitze, we even have a money-back guarantee!

Conclusion: Auto Digitizing Embroidery Software Works… If You Work It
Although auto-digitizing may seem like a clean solution to getting your designs digitized quick, most of the time, it isn’t. Any software brand does the best it can to digitize the designs automatically, but they all require some human assistance, and in most cases, manual digitization.
That’s why we wanted to shed light on the situation. Even with high-quality vector files, auto-digitizing might not generate the best results. Having the skills to digitize designs and images manually, to at least edit & optimize the design you auto-digitize, is a must.
Remember, there is no need to learn to use a graphics software if you’ll be bringing images into a digitizing software anyways. You’d basically be creating the same design twice and wasting your valuable time.
If you decide to add digitizing to your arsenal of machine embroidery skills, we think you’ve made the right choice. It will push you to become a better embroiderer. Get started today with our Free Embroidery Digitizing 101 Cheat Sheet & Video Course. It’ll equip you with the essential with the knowledge and theory to start creating your own beautiful machine embroidery designs.




Hello, I have Wilcom software and am thoroughly enjoying your teaching. I purchased the dream course and watch your YouTube videos. I am learning so much and wish I had this knowledge a few years ago when I ran a small custom apparel business. Would have saved me a lot of money in digitizing fees.
Looking forward to the patches videos. Thank you again.
Cindy Garner
Thanks for your support Cindy, keep an eye out for the patches videos soon 🙂