
This is one of those articles that might motivate those of you who like to experiment and stir your artistic flare within your digitizing, but will most likely not be something you will use within your daily practices. There are certain applications within corporate logos to which we have applied this technique, usually in areas that promote some artistic interpretation, such as the foliage portions of trees
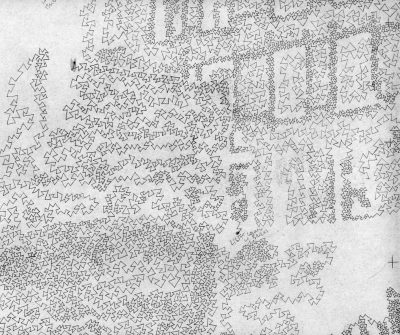
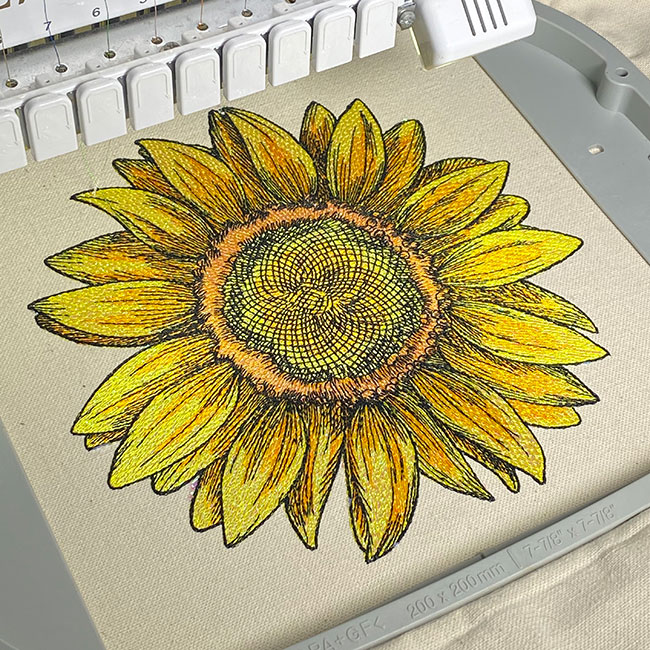
Fig. 1
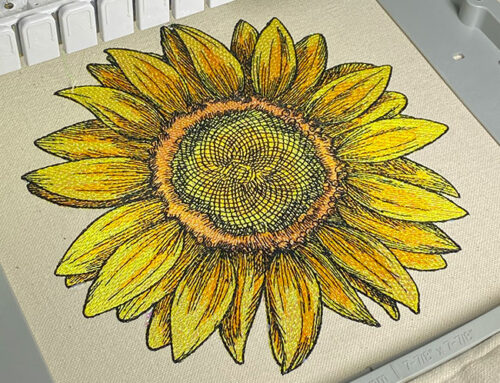
(fig.1) or creating effective water scenes. If you do want to pursue using this stitch effect in your corporate work I would suggest digitizing a fictitious logo that you can use to try and sell the technique. A finished sample is worth a thousand words. Like any process in digitizing that takes longer to produce than your standard corporate work, you’ll probably want to adjust your pricing for the service.

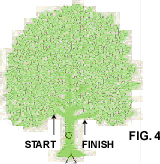
 Vermicelli stitches (more commonly know as stipple stitches today) are traditionally used to fill in larger areas with a single pass running stitch and can be created with rounded edges or sharp edges. Historically this stitch was used in the schiffli industry to create patterned yard goods mostly for the fashion and lingerie industry. The interesting thing about using this stitch effect is that even though it resembles a random loose effect, you really need to map and precisely place stitches to ensure a smooth running design without being trapped and having numerous unwanted jump stitches and trims. You’ll generally find that planning your artwork properly will far outweigh your actual digitizing time. Your art should start and stop in a continuous path to promote efficiency in production.
A couple years ago we created a very elaborate catalog that spoofed the National Enquirer. Within the front cover of this piece was an open area approximately 4×5 inches in which we wanted to place an actual embroidered piece to show our workmanship. Obviously producing something like this is not going to be cheap, but historically we have found it to be very effective. Sending out creatively embroidered materials to promote your business is always well worth the effort, they don’t end up in the trash as quickly as the plain printed materials do. With cost being the big factor in producing 10,000 of these catalogs we wanted to create something unique but with a relatively low stitch count.
We decided to do an alien design to go along with the whole theme and decided to use not only different colors but to also tighten and loosen the vermicelli stitch itself to show depth and simulate the reflection of light and the depth of shadows.

Right away we were very happy with the finished effect, as it almost resembled a chenille effect to the embroidery. The stitch count of a bearable 16487 stitches and five color changes wasn’t too bad considering the coverage of space. I actually liked the effect so much we embroidered it on a kid’s jacket and entered it in a trade competition; much to our surprise it took a first place!
With the success of what I considered a fairly simple design we immediately got to work on something a just little more challenging. The finished result of this momentary insanity was a “bridge scene” design that was geared to resemble an impressionist style.
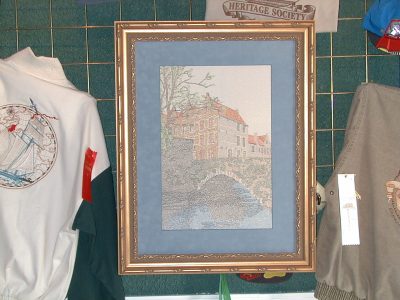
Although a finished stitch count of 136731 sounds high, given the fact that the dimensions of the design are 10×14 ¾ inches and had twenty-two colors, it’s not too bad. I can honestly say that anyone that knows how to enter a manual stitch could have physically digitized this design; each of the 136731 stitches was manually imputed one at a time. The only tricky part was trying not to lose your bearings in the sea of stitches. It took about 10 hours in the digitizing process, which included numerous breaks to compensate for eyestrain.
The real feat was in prepping the artwork. As some of you might have guessed punching something of this size and complexity is more easily done on a digitizing tablet as opposed to on-screen, I personally would have gotten lost about a thousand stitches into it if I tried it on-screen. Taking that into account we hand drafted the design at a 2/1 scale. The first step was blowing up the original photograph to the desired scale and affixing it to a light table. Because there is so much going on we then decided to further break the design down into four separate stages that would mold together as each section was done. Using a very thin tracing paper we were able to place on the light table each completed component of the draft on top of the next; allowing you to view the previous drafts and make sure everything would align upon completion with no gaps. This process took 5 painful days to complete and every stitch in the design was manually drawn with, of all things, a pencil; like most things, most of our old manual drafting utensils have fallen by the wayside with the use of computers to generate our artwork.
As with its’ predecessor the “alien” we tightened and loosened clusters of stitches, but this time we also tried to blend segments of colors to create more tones and depth in the image.
As always the real thing to be proud of in a design of this nature is what people don’t see in the finished product. That being the fluent flow of the design and the limitation of using trims and jumps.
Lastly was the task of choosing the proper colors in which to run the design. Artistic designs are made or broken by using your thread colors in the same way an artist blends colors on his palette. We ended up running it four times with different combinations before finally being content with the results. This is something I see happen frequently in our industry, usually when embroidering animals. You know the scenario; when customer calls saying, “the sample you sent me looks great, but when I stitch it off it looks like crap!” Whenever we do design work that falls into the “artistic” category we always provide the thread type and numbers for them to match up to whatever they carry in stock.
When this framed piece is on display most people don’t event realize that it is embroidered, they usually step forward and back a few times before they believe it. Once I tell them every stitch was hand drawn and manually stitched they ask if I’m a little daft, which I guess I must be!
Here’s a quick video I filmed on the bridge scene design:
Like most of you who share a passion for what you do, this type of thing needs to be done simply for the love of your trade and wanting to do something that falls outside of the corporate curse. So, if you have some extra time on your hands start playing with some of these long forgotten stitch types. And if you want to make it a career, then be prepared to starve to death! Who knows, maybe when we’re long dead and gone our grandchildren might actually be able to get a buck or two for this stuff. Until then we just have to do it because we can!
Leave A Comment