Are you looking for a fun and easy Halloween craft perfect for all ages?
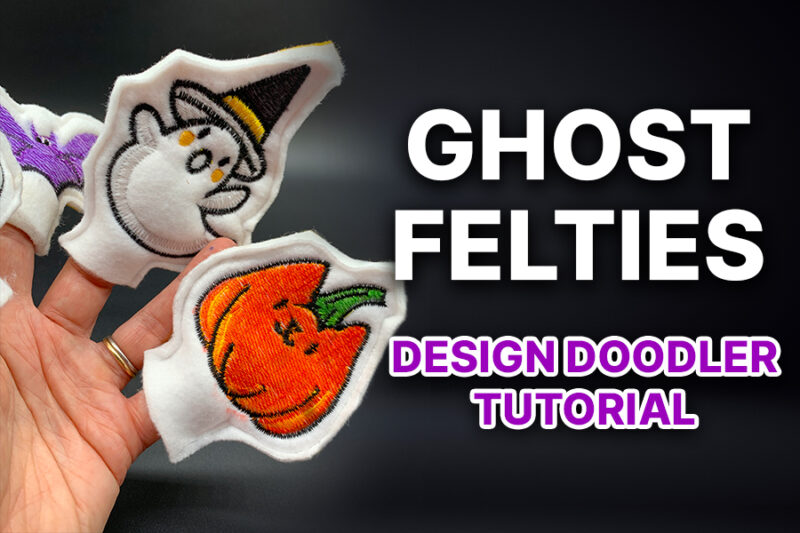
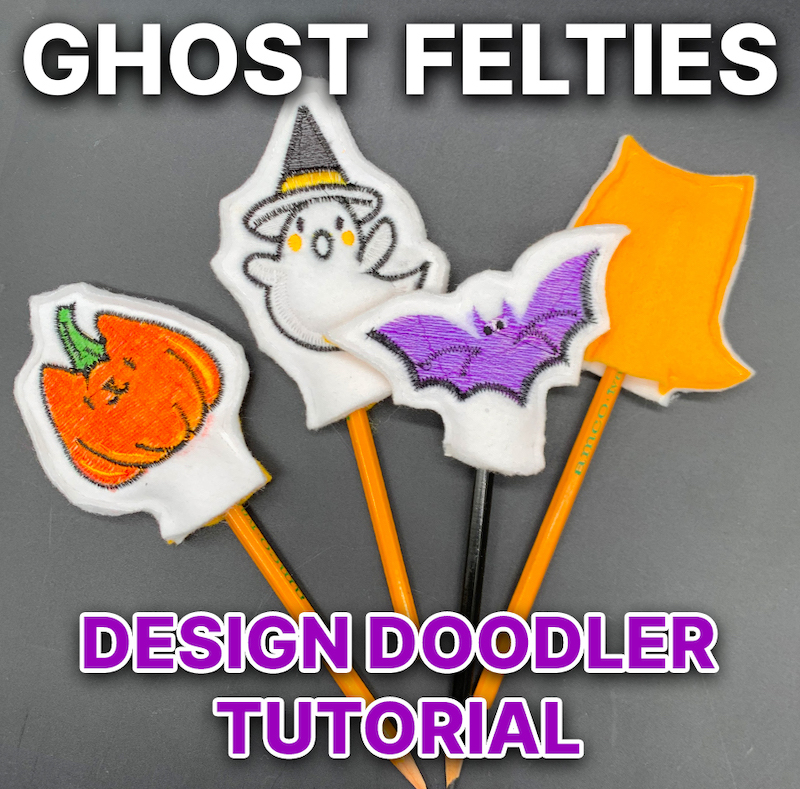
This ghost feltie tutorial is just what you need! Whether you’re making it as a finger puppet or a pencil topper, this spooky little ghost will add some Halloween spirit to your day.
With step-by-step instructions using the Design Doodler software, you’ll whip up these adorable felties in no time. Plus, it’s a fantastic project for beginners and a creative way to make the most of your embroidery machine. Let’s get crafting some ghostly fun!
Materials for Halloween Felties:
- Design Doodler Software
- New to the Doodler? Give the free Design Doodler demo a try and start creating your own embroidery designs! While you won’t be able to stitch them out, it’s a great way to explore all the features and get a feel for what’s possible. Includes 5 video lessons!
- Two 4×4-inch squares of white felt
- One 4×4 inch square of yellow felt
- One 4×4 inch square of poly batting
- Temporary adhesive spray
- Cutaway embroidery stabilizer
- Scissors
- Artwork you can download below
Creating Embroidered Halloween Felties on the Design Doodler:
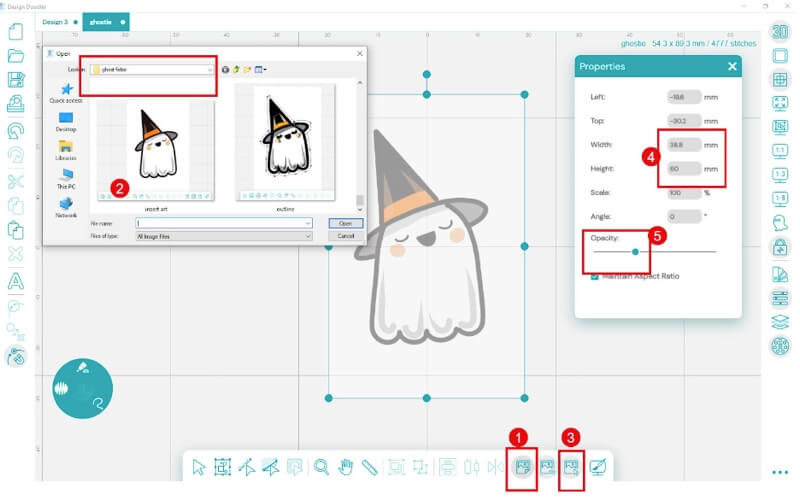
Step 1: Insert your artwork into your workspace by clicking on the “Load Backdrop” icon and navigating to where you have the artwork stored on your computer
Step 2: Find and insert your art file.
Step 3: Resize your artwork. Select the “Select Backdrop” tool
Step 4: Resize your artwork to 60mm x 39mm.
Step 5: Reduce the opacity using the slider in the properties tool.
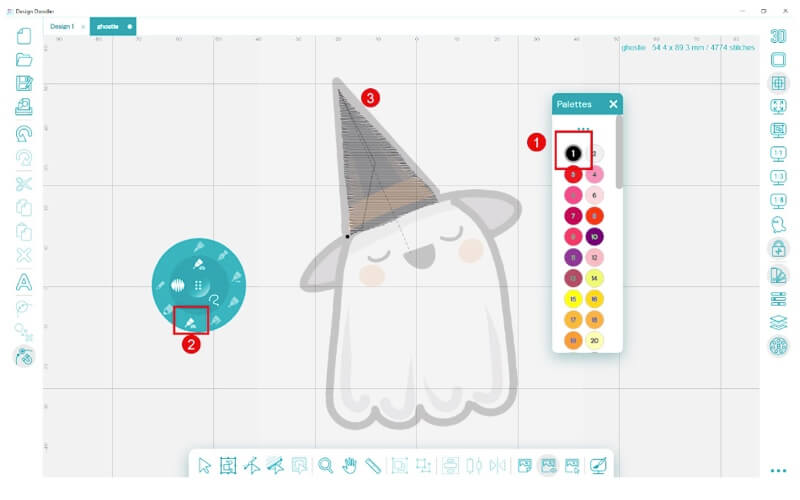
Step 1: Select the black from your color palette.
Step 2: Select the “Fill Brush” drawing tool on the widget.
Step 3: Draw the hat fill.
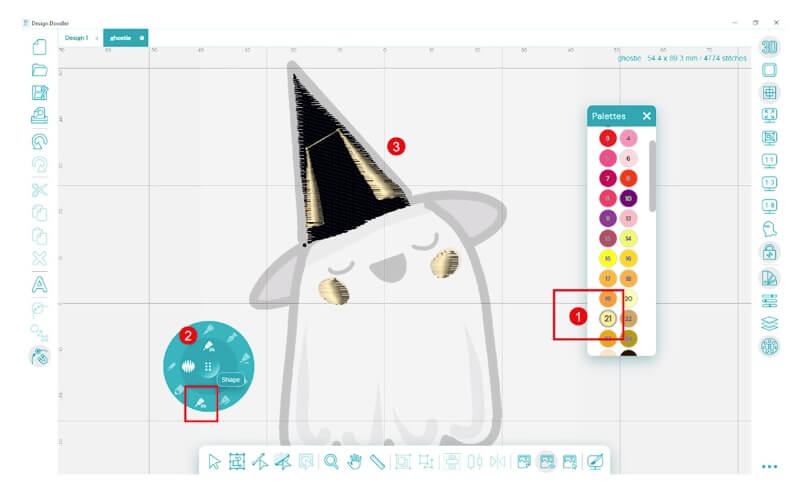
Step 1: Select light yellow from your color palette.
Step 2: Select the “Fill Brush” drawing tool on the widget.
Step 3: Create the highlights on the hat and the cheeks.
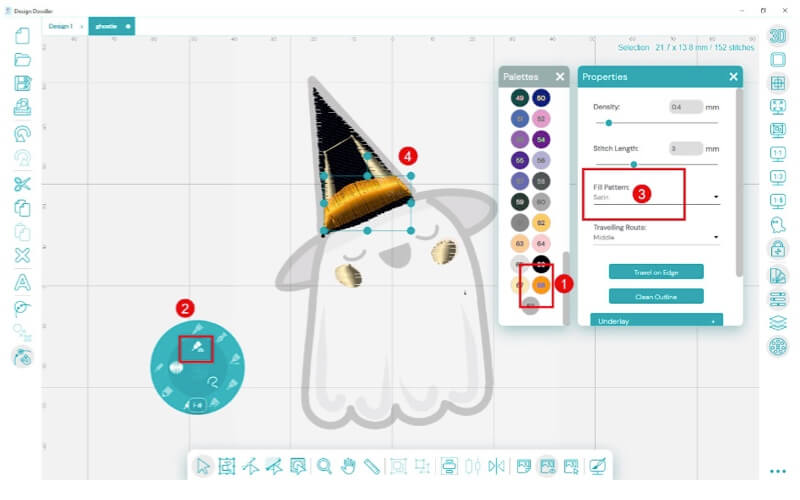
Step 1: Select yellow-orange from your color palette.
Step 2: Select the “Fill Brush” drawing tool on the widget.
Step 3: In the properties tab, change the “Fill” to “Satin.”
Step 4: Create the band on the hat.
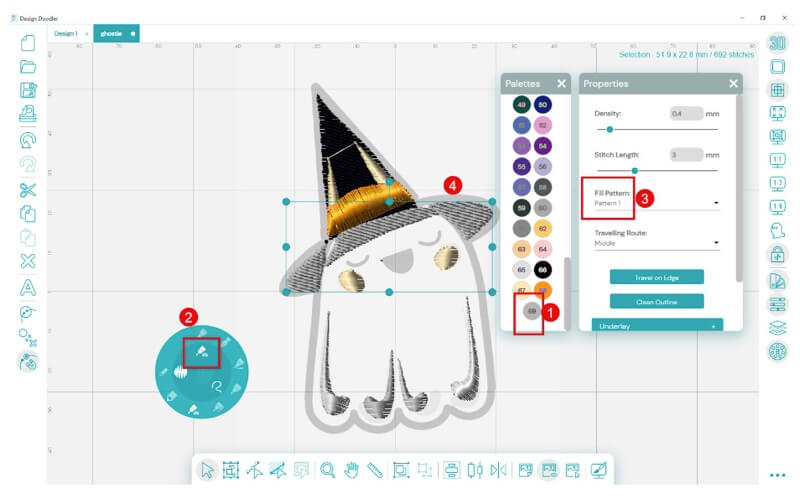
Step 1: Select light grey from your color palette.
Step 2: Select the “Fill Brush” tool on the widget.
Step 3: Set “Fill Pattern” to “Pattern 1” in the Properties Tab.
Step 4: Doodle the hat shadows.
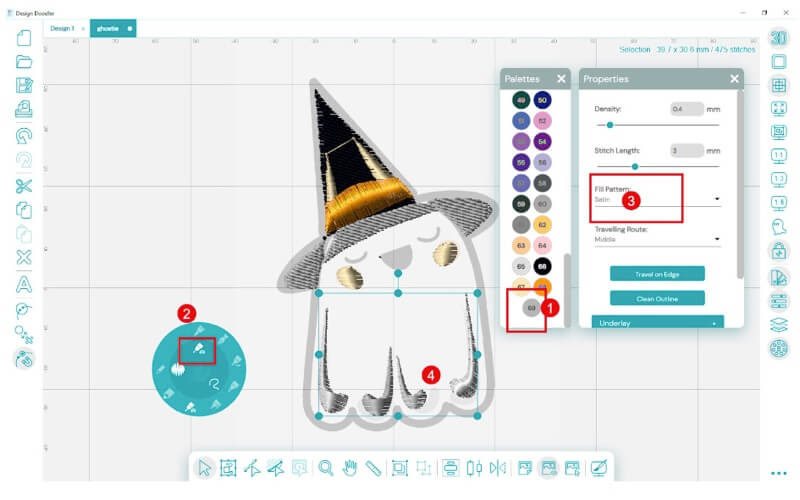
Step 1: Select light grey from your color palette.
Step 2: Select the “Fill Brush” tool on the widget.
Step 3: Set “Fill” to “Satin” in the Properties Tab.
Step 4: Doodle the highlights of the ghost.
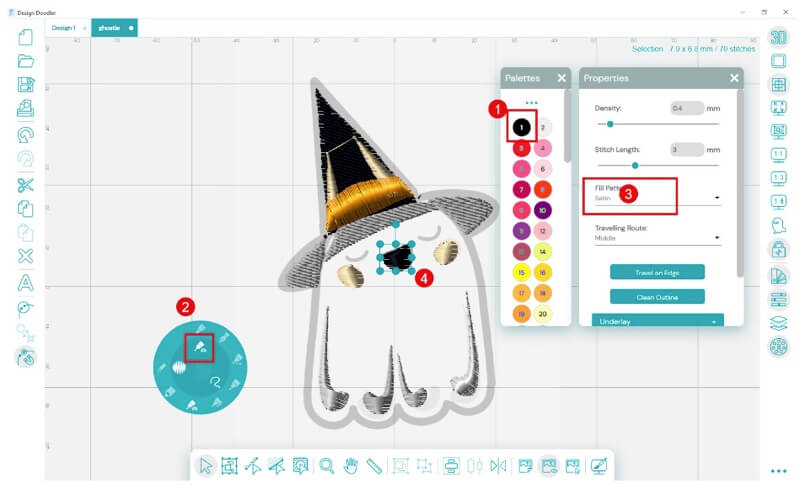
Step 1: Select black from your color palette.
Step 2: Select the “Fill Brush” tool on the widget.
Step 3: Set “Fill” to “Satin” in the Properties Tab.
Step 4: Doodle the mouth of the ghost.
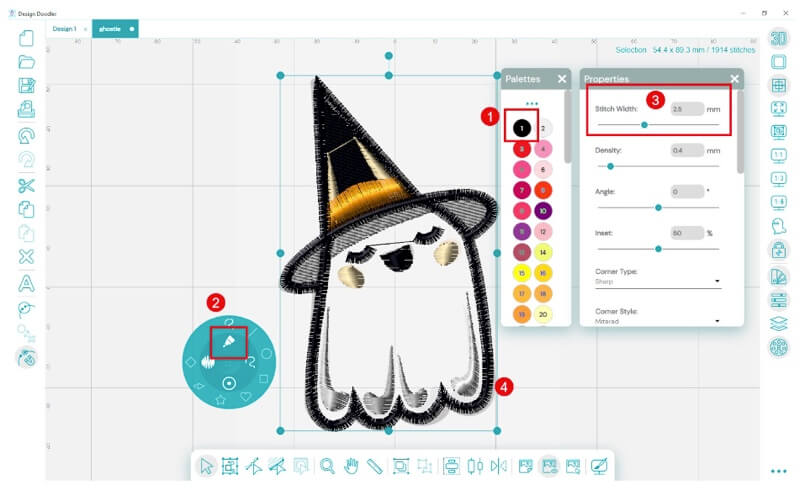
Step 1: Select black from your color palette.
Step 2: Select the “Steil” stitch on the widget.
Step 3: Change the stitch width to 2.5mm in the Properties Tab.
Step 4: Doodle the outlines and eyes.
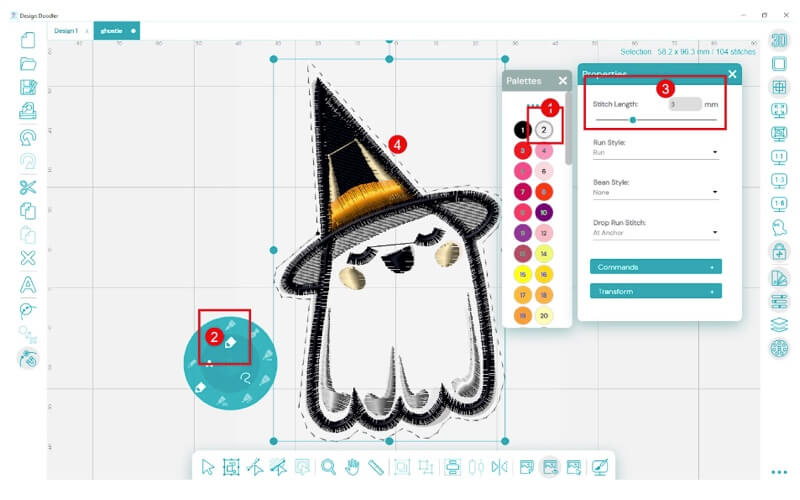
Step 1: Select white from your color palette.
Step 2: Select the “Run Bean” stitch on the widget.
Step 3: Select a 3mm stitch length in the Properties Tab.
Step 4: Doodle the outline of your ghost with the satin stitch. Leave an opening at the bottom for a pencil topper or finger puppet.
The opening size will depend on whether you use it for an adult or child finger puppet or a pencil topper.
Sizing we suggest:
- Adult finger opening: 1.0-1.25 inches
- Child finger opening: 0.75-1.0 inches
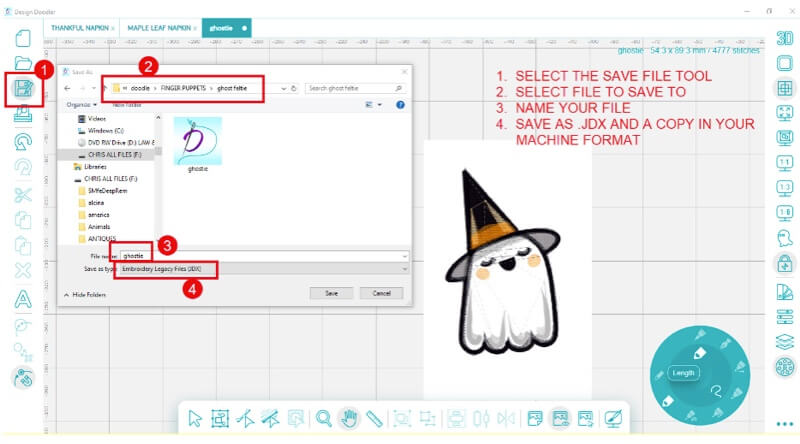
Step 1: Choose the “Save As” icon.
Step 2: Navigate to the location you would like to save in.
Step 3: Name your file.
Step 4: Save as a .jdx (native) file and repeat this process, saving as a machine file for your machine type.
Embroidering A Halloween Ghost Feltie:
Step 1: Hoop a piece of white cutaway stabilizer.
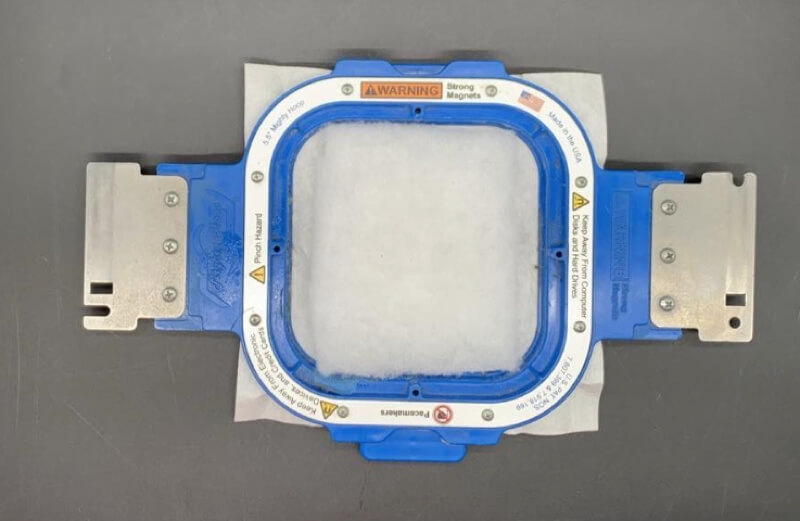
Step 2: Lightly spray the back of the batting and lay in the center of the hoop.
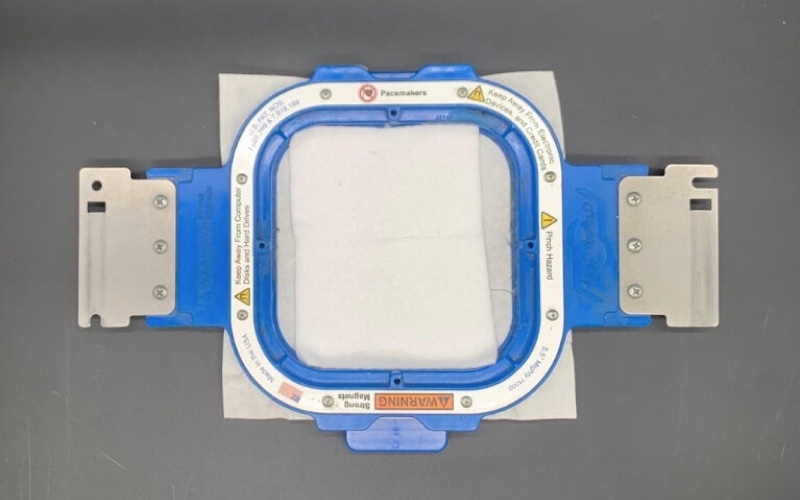
Step 3: Lightly spray the back of one of your white felt squares and lay on the batting.
Step 4: Insert into the machine and stitch until you reach the running stitch (last step).
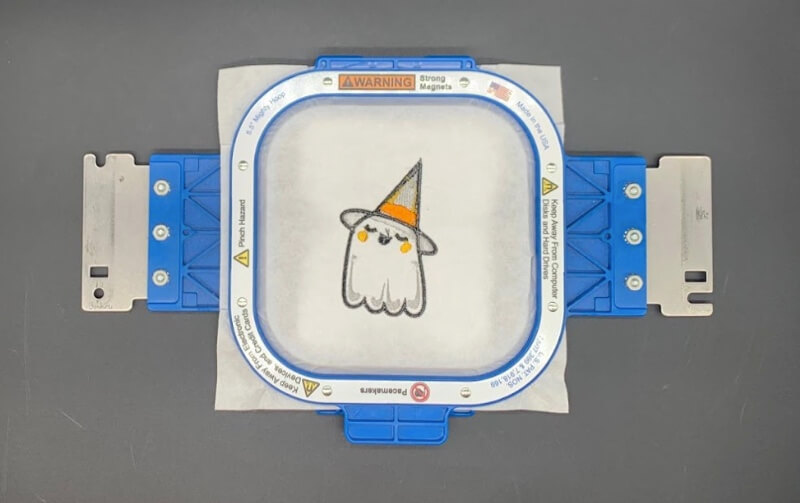
Step 5: After it’s stitched up until the last white stitching line, remove it from the machine and lay it face down on a work surface.
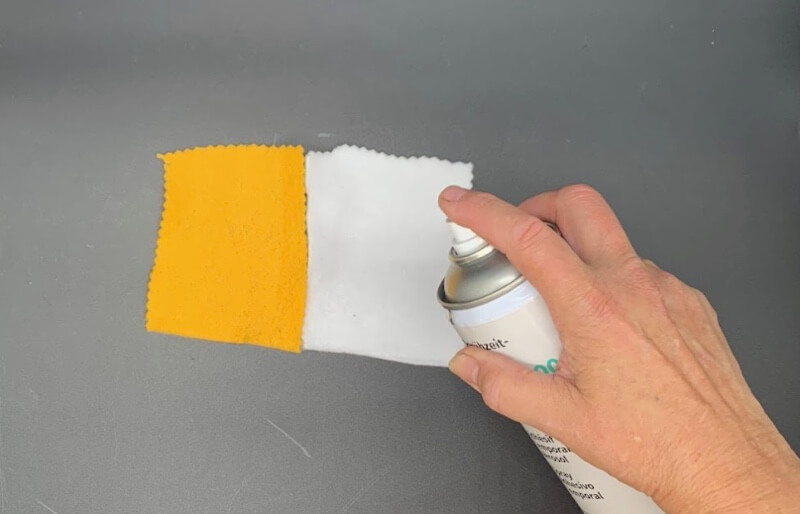
Step 6: Lightly spray the remaining piece of white felt and lay down on the back side of the hoop.
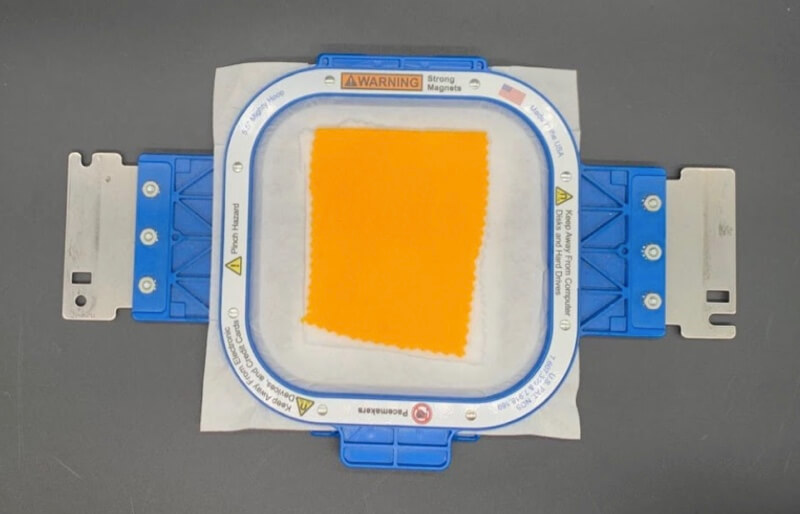
Step 7: Lightly spray the piece of yellow felt and lay it on the white.
Step 8: Secure it with tape if desired.
Step 9: Return to the machine and stitch to the end of the design.
Step 10: Remove it from the hoop and trim around the outside satin stitch (we used pinking shears).
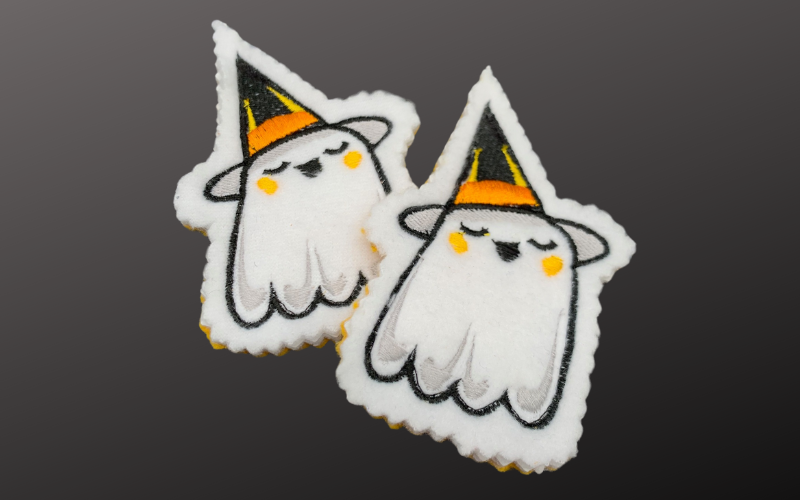
Your fun embroidered Halloween finger puppet or pencil topper is complete and ready to add fun to this spooky holiday season!
Try this tutorial and switch up your design for personalized projects! If you haven’t yet, don’t miss out—try a free demo of the Design Doodler software to see how easy it is to create your own personalized designs!
If you create this project, we’d love for you to share it with us in our Facebook Embroidery Design Doodler Software Official Group.
Until next time, happy doodling!

Leave A Comment