ZZZZZZZZZZZZZZZZZOOOOOOOOMMMMM sounds fast, doesn’t it? Not safe for interstate, and certainly not for a school zone! By the way…. Not good for embroidery either! Today we are going to jump into speed and what it means for embroidery!
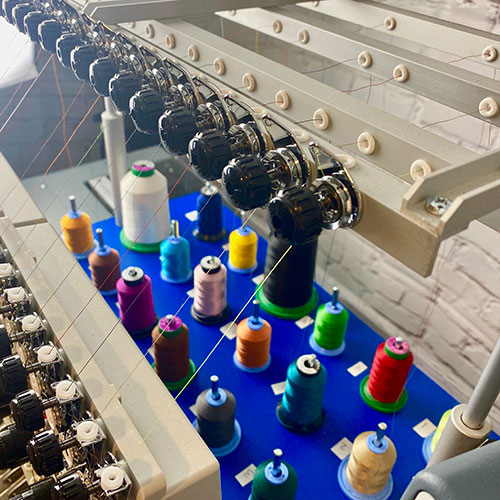
Just because your car can drive 220 mph doesn’t mean it should. The same goes for your embroidery machine.
We recently had someone send us a picture of a piece she was working on that was just not great. It was scrunched and puckered. She was at her wit’s end until we asked her how fast she was stitching. She was not sure and had not explored adjusting her machine speed.
Subsequent stitching at a significantly reduced speed produced a stunning result, and she gratefully resent her results. In this case, speed was the culprit. Though speed is not always the problem, it is important to discuss how to look to your “gas pedal” for solutions.
A majority of home embroidery machine manufacturers produce machines capable of adjusting speed, and all commercial machines can slow down and speed up with recommended operating speeds. These adjustments are put in place so that it is possible to account for fabric type, thread content, placement, and other factors.
In this article, we’ll discuss:
- How fast embroidery machines can go
- How fast should embroidery machines go
- How speed affects your project and the machine
- Other options for keeping up the pace and saving materials
Take a watch at the video below to see if faster embroidery machines are better:
Why Is Machine Speed Important?
So let’s get right to it! Why do we care about speed? Aside from the best part of ourselves, which wants to see our beautiful creation “right now,” most people don’t want to spend a lot of time waiting. Commercial embroiderers care about the time it takes because time is money, and the faster you get that cap off the machine and another one loaded, the more money you make.
Embroidery Production Time
Production time is the time it takes for each piece to be hooped, placed in the machine, and embroidered, and then removed and trimmed or finished. The amount of time varies on the number of stitches and how the design was digitized.
To figure out production time, simply take the number of stitches divided by the speed at which you are stitching. Remember, the “speed” is just an average; machines don’t just jump into stitching at light speed. They ease up to the selected number.
NUMBER OF STITCHES ÷ SPEED OF MACHINE = STITCHING TIME IN MIN
EX: 12500 STITCHES ÷ 650 SPM = 19.2 MINUTES
Keep in mind that things like color changes on single needle machines, needle or thread breaks etc. can lengthen the time.
Factors That Lessen Production Time
Poorly Digitized Embroidery Designs
Good digitizing has a significant effect on production time, and using well-thought-out designs makes a big difference. A thoughtfully digitized design has been created with the least amount of stitches, trims, color changes, and more. Skillfully digitized designs will save you more money than the cost of purchasing the file if you will be duplicating it or using it often.
To get the best results, use good quality designs that are digitized for production or invest in learning digitizing to understand how designs stitch out and can recognize problems before they cost you time and money.
Check out our Embroidery Legacy Design Kit that includes 11 stitch-friendly designs, so you can try for yourself the difference quality embroidery designs make. Or, if you’ve already tried our designs, be sure to check out our almost 30,000 different embroidery designs that are soft to the touch and make your machine sing.
Thread Breaks
We all hate thread breaks! The machine is going along, all is well until….snap! Most home machines have a thread break detection function. It operates like a “deadman switch” on a train engine. If the Engineer was overtaken by a hijacker, ill, or lost his footing and his foot left the switch, the train comes to a screeching halt. All newer commercial machines have this feature, and older commercial machines vary since they assume there is a tender standing by.
So many factors can cause thread breaks but we’ll stick with the main ones. Thread quality is very important. Cheap inconsistent thread tends to break as well as old or out-of-date thread. Yes, thread does have a shelf life, so pass up any offers of “old” thread since it will cost you more in the long run. Also, remember that thread does not like super dry and hot or damp and dark; if you would not live there, do not store your thread there.
Another factor is thread content. Polyester thread is the most consistent and durable thread, so it has less of a tendency to break. On the other hand, Rayon thread is a synthetic fiber made from wood cellulose, and though it looks beautiful, it can be difficult.
To learn more about different types of machine embroidery threads and when to use them, click here.
Perhaps the leading cause of thread breaks concerning speed is that the thread cannot withstand the stress and strain caused by the speed.
One more note on thread breaks, keeping your machine tension discs clean and free of lint is beneficial. Many operators use a few drops of silicone lubricant on a cone of thread to periodically lubricate the discs and make the thread glide more easily (and we do mean a drop or two!)
Nesting
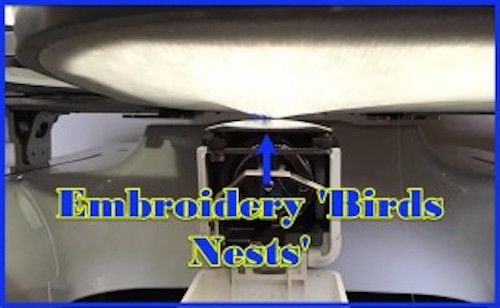
Nesting is a wad of thread bunched up under your embroidery on the bobbin side and can occur in many ways, but the main culprits are:
- Incorrect threading of the upper thread
- Tight bobbin tension and loose top tension combined
- Small bits of thread or dust
- Bouncing of the hoop (called Flagging)
- Speed too fast for material
Push and Pull & Their Relation To Speed
Push and Pull compensation is where a tiny bit is added to the overall size of an object to be stitched. Usually, these objects are long stitches or large tatami fills that begin to pull the object out of shape when stitched out. The added size of the object compensates for the shrink of a lot of stitches facing the same way, but it does not make the machine “stitch looser.”
To better understand push and pull compensation in embroidery and why it’s essential in digitizing, click here.
When you rush the machine, the problem is that pull and push become even worse due to the added energy put into the stitching. If you walk back and forth between two rows of trees and carry a rope, the tension is pretty even, and the rope lays down.
If you race through it as you round each tree, it is pulled tight while you race to the next. As you stitch sections, they contract and distort areas of the fabric, and when you move to a new section, you are working at a disadvantage because your new work surface is already distorted.
Missing Stitches
Have you ever been stitching and look down to find skipped or missing stitches? Speed could have played a part. By running too fast in certain applications, you skip stitches because you are not giving the machine enough time to recover and move to the next stitch.
High speed also causes the needle to deflect and miss the hook. Commercial machines are designed to operate within these conditions.
Fine and Light Fabrics
Unless you are trying to smock your lightweight fabrics, speed will cause a lot of puckers. Please be gentle with the silks, nylons, tulles, and other fabrics. A slower machine will put less energy into the stitching and allow the fabric to lay more naturally with fewer puckers.
Recommended Machine Speed For Your Embroidery Project
So we have discussed so many speed factors, but just what is the best speed for your project? As with everything in life, it depends. A safe bet for standard fabrics in typical situations would be around 600-700 spm. A slower speed will give you a neater result, and unless you have to run 1000 hats, why not slow down and have it stitch out well the first time!
Lighter fabrics like lace (or making free-standing lace) or netting, silks, and light nylon slow it down as much as possible. The energy and force put into the thread is simply too much and wads up the fabric. Leather and vinyl are similar; take care with those fabrics since you cannot re-stitch them.
Learn more about the 3 main fabric types used in machine embroidery by clicking here; this will guide you into the best fabric to use for different embroidery designs for the best results.
An additional consideration when choosing speed is what you are stitching. Lettering and details do much better when the machine is slowed down. Truly the only way to find the best speed for you is to test. You will get to know what your machine likes and adjust accordingly.
Benefits Of Choosing The Right Speed
You will find as you embroider more and more where you can “push the limits” of speed and where you cannot. Here are some things to keep in mind when deciding to dial that speed down:
Embroidery Machine Life
In this day and age of disposable items, here is one time when the care in the maintenance of your machine will prevent you from an unneeded, costly purchase. Today’s commercial machines (like the Tajima, ZSK, or Barudan) are designed to be 24/7/365 workhorses that can easily run at speeds up to 1200 spm. They are adjustable, so when you need to slow down (lace, tulle, nylon, etc.), you can, and when you need to get that job done with an eye to speed and quality, the potential is there.
There are fewer plastic parts on commercial machines because metal has less wear and tear, and there is less distortion with higher speeds. High speeds in commercial machines and some home machines produce a significant amount of heat in the bobbin race, so oiling on each bobbin replacement is mandatory in commercial machines.
Frame vibration: If you have ever tried to thread a needle in a car driving down a bumpy country road, you know the agony your machine feels if it vibrates while trying to stitch. Called “flagging,” with higher speeds, your hoop or frame will vibrate and bounce, adding additional movement and energy to your machine and producing distortion.
Fewer needle breaks: When your machine stitches, the needle plunges into the fabric, and the rotating hook passes by picking up the thread on the backside of your needle. (Always remember to put the “scarf” [the indented side of the needle eye] on the side of the rotating hook and rotate it a few degrees to the right on most commercial machines.)
As the needle rises out of the fabric, the frame is moved to the next location your needle will pierce. If your machine is careening about your design, needle deflection is created. The needle is bowed slightly out of place because it is not done rising out of the fabric when the frame starts to move. Now, some of this can be from machine adjustments, but the minute amount of deflection caused by speed compounded over hundreds of stitches is evident.
Other Factors To Consider
Of course this is only touching the tip of the iceberg but let’s discuss a few other things which arise and are affected by speed.
Thread Tension
Home machines have tension adjustment discs and can be adjusted to improve stitching. For commercial users, long-time operators can pull on thread through the needle and determine tension by that alone. For the rest of us, there are wonderful tension gauges, either mechanical or digital available from most thread dealers. Make sure to always check your owner’s manual for recommendations geared specifically for your brand.
For our commercial operators, a majority of machines have three sets of tension discs. Did you know that the largest tension set at the bottom is not the strongest? It is the first tension set on the top. That set accounts for 50% of the tension adjustment in commercial machines. The second spot accounts for 30%, and the final (largest) set for 20%. Again, consult your tech or your manual for more information geared toward you.
The H Test
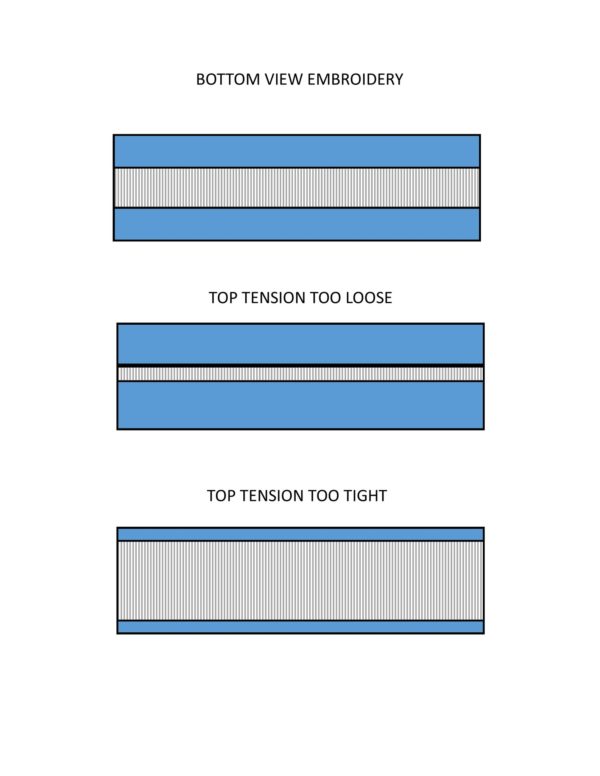
If you have not done an “H” test, it is simple! Create several capital H letters in satin stitch. A good starting place is a letter that has ¼ to 1/3 inch wide sections so that you can see the top and bobbin thread on the back. Stitch out one for each needle and then turn it over and check the back. The bobbin thread should be the middle 1/3, and the two sides should be equal thirds of the top thread, which has been pulled to the backside.
This test is a must for all of us and your first stop when there are tension problems. Make sure to check how your speed affects your stitching by running an H test at different speeds.
Conclusion: Embroidery Machine Speed Effects Design Results
We have touched on several speed factors; you will find some of these more important to your work than others but let’s recap the highlights for you to take away from today’s blog.
- Start with a reputable design from a known source of quality designs. Our designs at Embroidery Legacy are perfectly suited for your work and stitch out soft and supple. These are designed with production in mind and will stitch out well at higher speeds. Click here to access our almost 30,000 embroidery designs.
- Learn digitizing to understand your project better. It is extremely important to understand how your designs work and how they are thought out. Check out our free Embroidery Digitizing 101 Course to learn the basics of digitizing for yourself by clicking here.
- Slow the machine to the correct speed. There are different speed limits for various fabrics, threads, and applications! Do some testing to see what works best for you and your machine. A safe bet for standard fabrics in typical situations would be around 600-700 spm.
- Make sure maintenance is done, and hooping is correct. Learn to check tension and adjust the speed of your machine. Use the right size hoop for the project to reduce “flagging”.
Remember, obey the speed limit and keep on stitching until we meet again!
P.S. If you haven’t already, don’t forget to download your free Embroidery Legacy Design kit to try our high-quality, always smooth-running embroidery designs!




Such an important discussion that each and every embroiderer should have. Most machine companies don’t want to talk about this topic. Too many times I have heard that the machine speeds don’t need to be slowed down which is such a fallacy. Thank you for addressing such an important topic.
Thanks for taking the time to read Luci!
Great article. Very informative and helpful though I usually have my machine set at medium so haven’t had any issues. Love your informative articles.
Thanks for reading Toni, sounds like you’re on the right track 🙂
Dear Mr. John Deer,
Good Morning,
I like to call you my “Master or Guru” in terms of guiding me to light up my dreams by the way of embroidery. It really started a few weeks ago about embroidery through different you-tube channels and finally landed at the doorsteps of “The Deer’s Embroidery Legacy”. As you mentioned in your earlier lessons, that start to crawl, walk and then run. You are absolutely right, finally joined your learner’s club through the help of my relative who is working in Newyork. Slowly being able to pick up lessons. With your guidance and blessing of God, could able to crawl and walk nicely in the Embroidery field. Your lessons are fantastic and getting along. Thank you so much, stay safe.
Thank you so much for your kind words & positive feedback!
Great Great article! I have small letters and was wondering why they were getting distorted.. this makes sense! Thank you so so much! I have a brother 10 needle.
Thanks for reading! Glad you found the information useful 🙂
Thank you so much for this article. I have been having trouble with all of the above mentioned problems. I am excited to try the instructions to make a better product. In the process of making a wedding dress for a client and this came at the exact time I needed. PRAISE GOD!!!
Glad to hear it’s helped you Bobbie! Best of luck with the wedding dress, sounds amazing!
I like to thank you for your videos I am new at this. Just purchased a 10 needle prox1050. Still practicing. But having fun with this machine.
Thanks for your support Ruth 🙂 it’s all about learning & having fun!
The tip on the speed of my machine on certain material and the softness of Rayon thread are ones I will absolutely use.
Thank You
Pam B
Great to hear; thanks for your support Pam!