Have you ever purchased a gorgeous lace embroidery design and wondered how in the world you’re going to put it on a sample continuously?
If so, you’re not alone. Making a garment with continuous lace looks like it can be challenging, and some may feel intimidated by the idea.
But let me tell you, it’s actually quite easy once you get the hang of it. Plus, the end result will leave you feeling both excited and proud! Imagine embroidering the perfect lace lining on your table runner, or putting a stunning lace border on the bottom of your favorite shirt. We all want to make that perfect sample, not just something someone sees and says, “thats nice” but something that makes others say, “wow, you really made that?”. Embroidered continuous lace can be gorgeous if you know how..
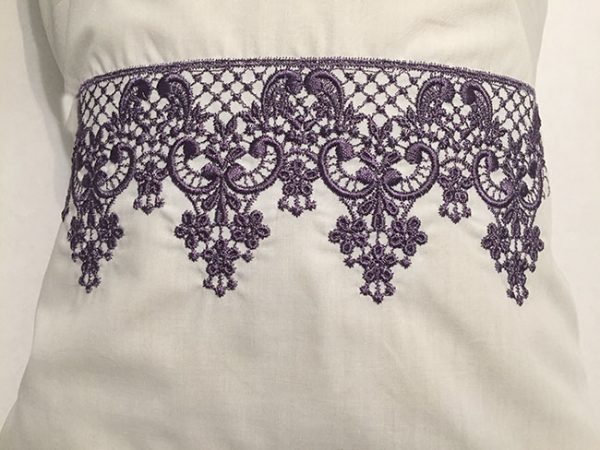
What to Embroider Freestanding Continuous Lace On
If you have a love for lace anything like I do, then you know lace can pretty much be put on anything. Whether it’s clothing, towels, table cloths, or really anything else, adding lace onto a garment always adds a touch of elegance and that extra ‘wow’ factor. I’m sure you’ve seen those beautiful lace headpieces or wedding dresses with gorgeous lace necklines. Haven’t you ever wondered how in the world those embroidered lace designs seamlessly run together? Well, get ready to learn!
Important: Lace Embroidery Musts
Before we get into how to repeat our lace designs, we need to talk about embroidered lace itself, thread, and stabilizer. If you’ve never embroidered freestanding lace before, click here for a full tutorial on how to properly embroider freestanding lace plus some special tips & tricks.
Lace Designs
It makes a huge difference what machine embroidery designs you use. There are so many different designs out there, and if you choose a design that was not digitized professionally to begin with, it can ruin your garments or décor! You want to embroider lace designs that run smoothly, don’t pucker, and once stitched out, look like they were made for your garment. Not added on afterwards.
Now, I may be a bit biased, but I strongly believe that Embroidery Legacy’s lace designs are some of the best embroidery designs in the market. I’m biased for good reason though! Our lace designs are true vintage as they were created in the 1950s by my great-grandparents for the wedding industry. Each design was manually crafted one stitch at a time by European Schiffli Masters and later converted to run on your modern-day embroidery machine. Who else can say that?! They are definitely one of a kind, and if I do say so myself, they run perfect and are stunning once sewn out. You can find these vintage freestanding lace designs by clicking here.
Lace Thread
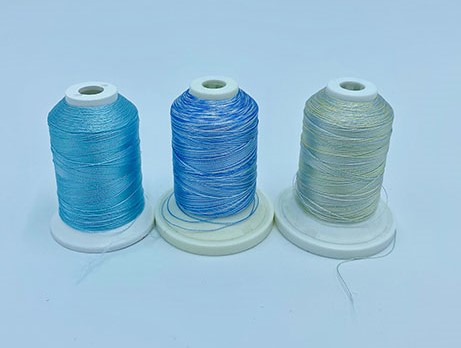
Another key factor to sewing out the perfect lace border is the embroidery thread you choose to use. We highly suggest using rayon thread for freestanding lace as it is soft and more suitable for intricate work. You can learn more about different threads and when to use them by clicking here.
Freestanding Lace Stabilizer
You always need to make sure you have the proper stabilizer when stitching out freestanding lace. You do not want something that will still be seen after sewing out your lace; you want something that will come off easily and not hinder your stitching. To still allow your lace to be soft to the touch and flexible, we suggest using dissolve away mesh. It’s so easy to get rid of you simply put it in water, and it disappears! To learn more about stabilizer and when to use them click here.
Step-by-Step Instructions for Sewing Freestanding Continuous Lace
After selecting your lace design, choosing the right thread and stabilizer, and determining the garment you’re going to spruce up, it’s time to put them together!
Making a continuous lace border is easier than you think using these simple steps.
How to embroider continuous lace and attach to your garment
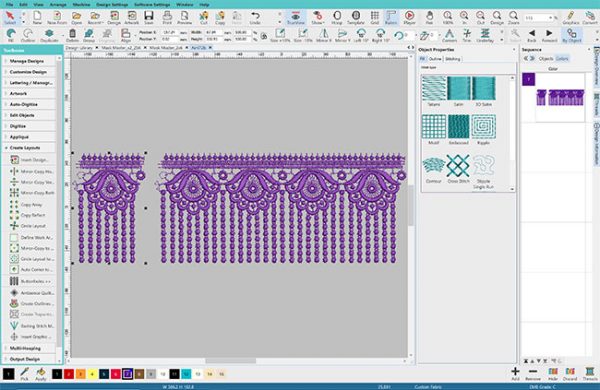
Step 1: Using your embroidery software, combine your lace units (depending on your project, combine as many as you need or as many will fill your hoop). When you combine them, be sure to copy and paste the design, make sure when you move the new pieces, you align them with the tick marks.
Step 2: Embroider your design using Rayon thread on dissolve away mesh stabilizer.
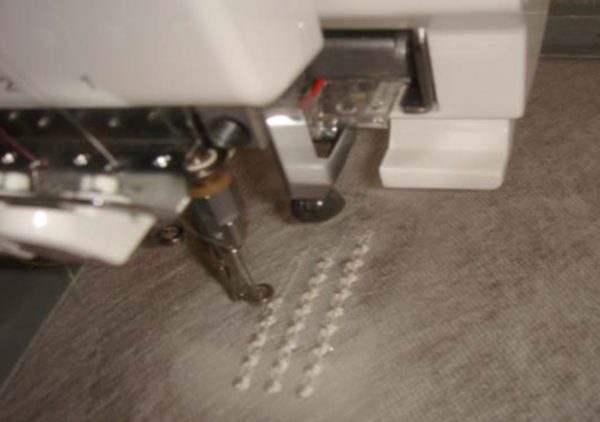
Step 3: Run as many single designs or combined designs as necessary to complete your project.
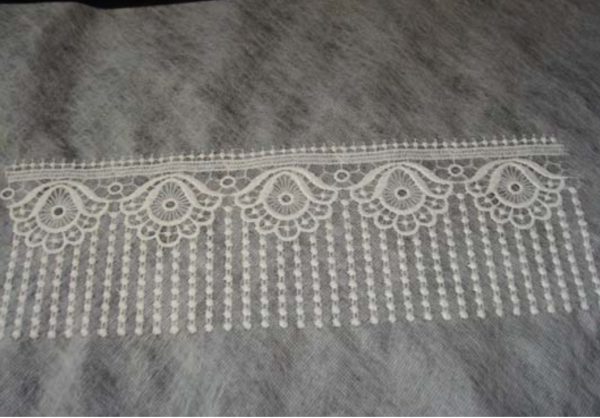
Step 4: Leaving your lace design on the stabilizer, trim with scissors close to design.
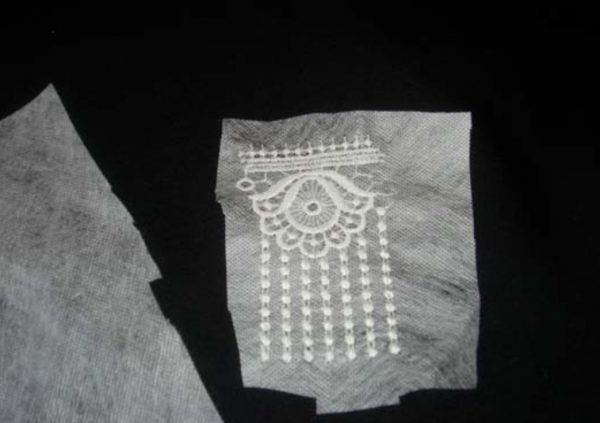
Step 5: Place tick marks for alignment where you are going to attach your other design. Attach pieces together using a small zigzag stitch (2.5 width and 1.0 length)
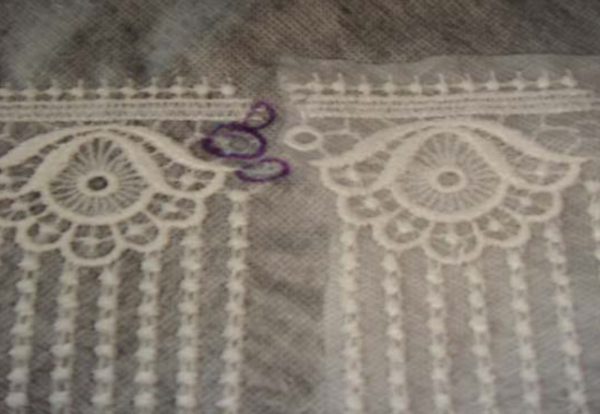
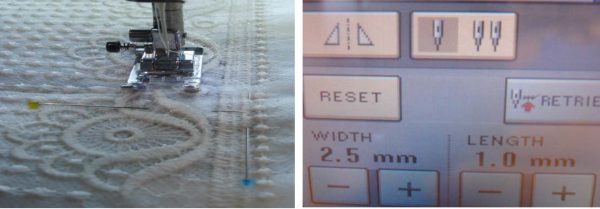
Step 6: Leave your stabilizer on and attach the lace to your fabric using the same small zigzag stitch by following the shape of the design.
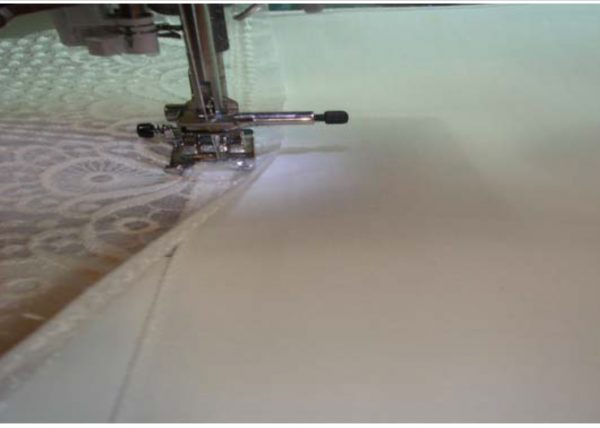
Step 7: After attaching the lace, rinse it in hot water to remove the stabilizer.
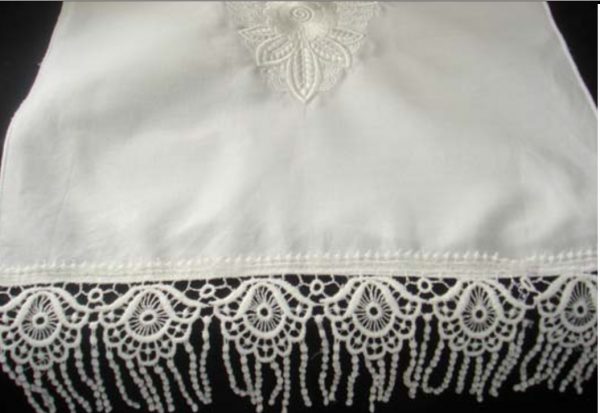
How to embroider continuous lace directly to your garment
Step 1: Stitch your lace directly to your fabric using your editing software. Combine as many units as you need for your project or to fill the hoop. To combine copy and paste the design, move the new pieces to align with the tick marks.

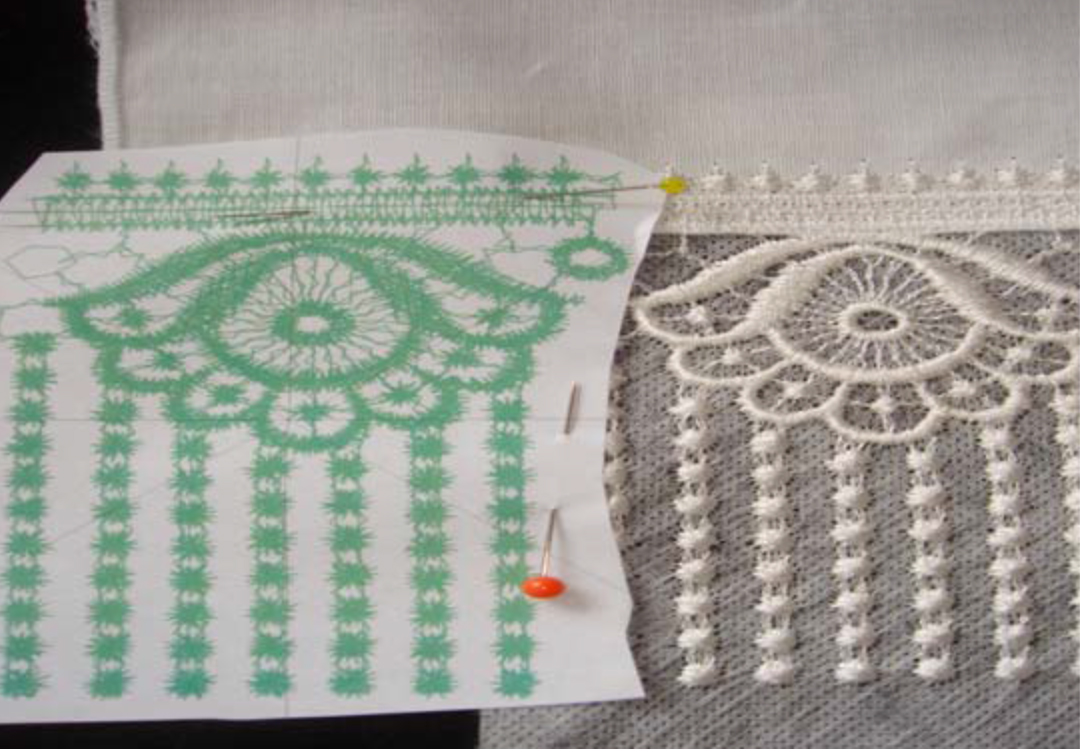
Step 2: Print a template from your editing software showing the design, xy axis, and hoop. Use dissolve away mesh stabilizer in your hoop.
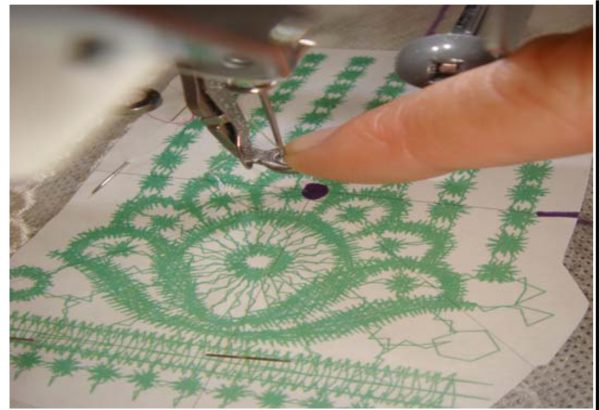
Step 3: Pin your template to the fabric where you want it to stitch.
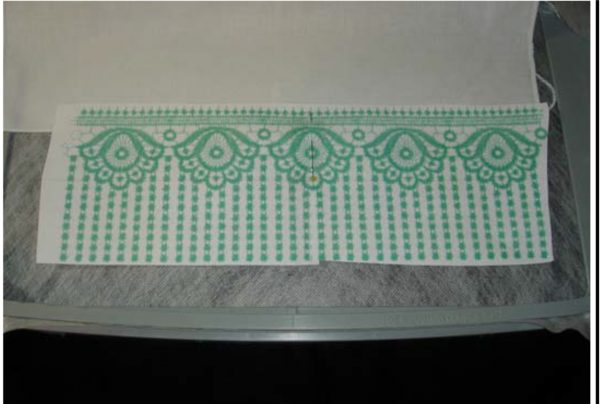
Step 4: Find the center of the design using the XY axis from the template and the center placement on your machine.
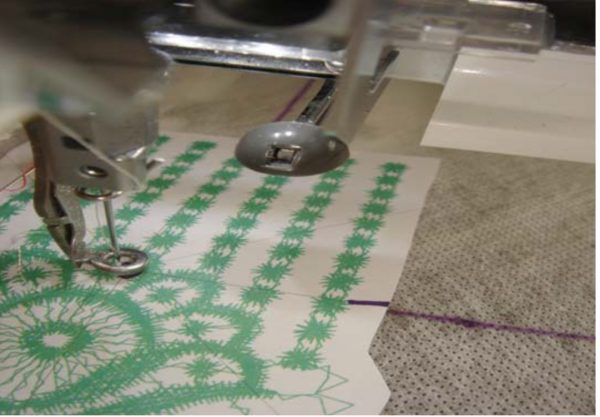
Step 5: Being to stitch your design.
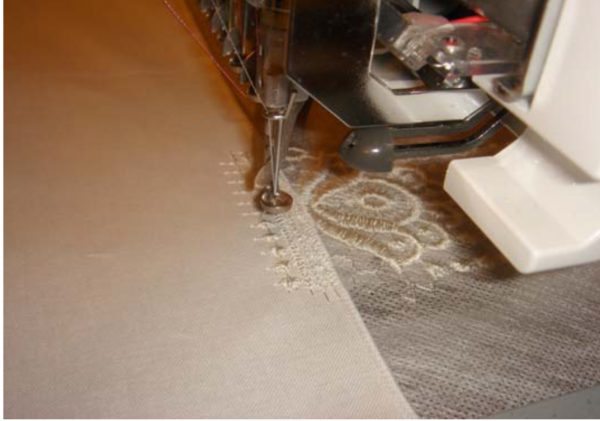
Step 6: After your design is finished stitching, remove it from the hoop but do not remove the stabilizer from the design.
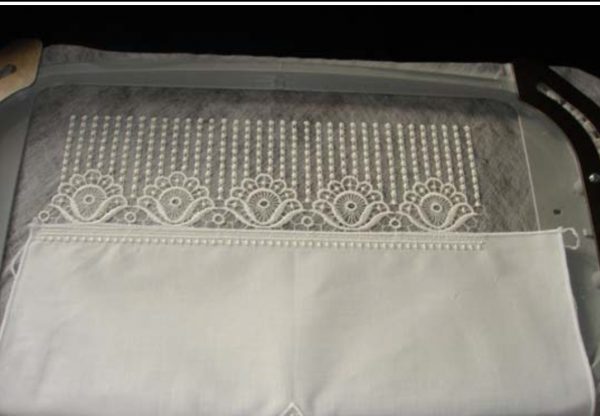
Step 7: Again, hoop dissolve away mesh stabilizer in your hoop. Pin the next template to your fabric, aligning it with the tick marks. Use adhesive spray to lightly spray the fabric and attach the hooped stabilizer. Finish stitching the remainder of the design.
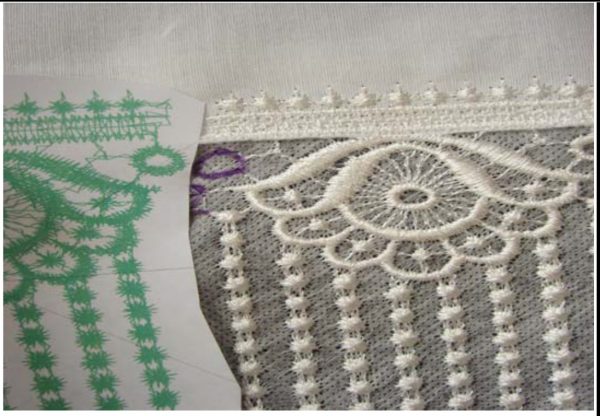
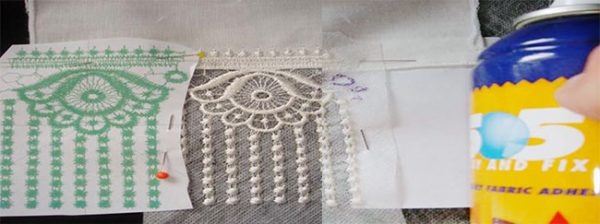
Step 8: Once the design is completed, remove the stabilizer by rinsing it in hot water.
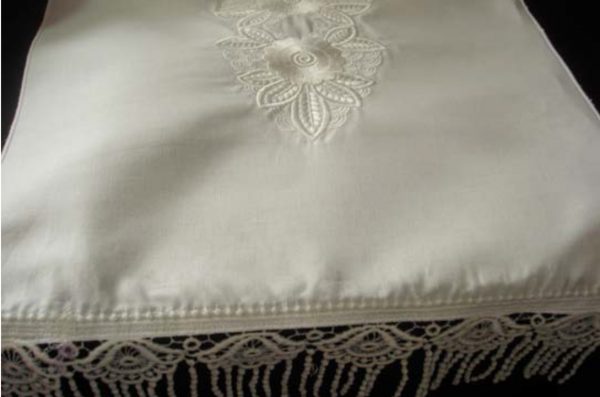
Now that you know the essentials for stitching out lace designs and also how to sew continuous lace onto garments properly, it’s your turn to try it out! You can find our list of elegant vintage lace designs by clicking here.
Happy stitching!




Thank you so much for such detailed instructions. I do have a couple of questions for you. One, why do you prefer to use wash away mesh over wash away stabilizer? Second, what size of needle do you recommend for your lace designs? I know I said I had a couple of questions, but I thought of one more. If I wanted to use one of your lace borders, how would I establish a corner piece to go with it?
Our pleasure Maria,
Wash away mesh has “fabric” texture, we be might be talking about the same product just a slightly different name? We generally use a standard 75/11 for 90% of our embroidery needs. As our lace designs were manually punched decades ago for the bridal industry. Also, “corner pieces” would not have been created for specific designs.
Hope that helps & thanks for commenting! 🙂
So for the delay in reading your response John and thank you so much with regards to the needle size that you use as well. Right after I sent you this questions, I realized what you meant by wash away mesh stabilizer. It is like I had an aha moment. Just one more question for you. Do any of your lace designs which you would recommend so use as borders and corners?
Hi Maria, here is blog on needle sizes which I wrote: https://www.digitizingmadeeasy.com/needle-know-how-lets-get-to-the-point/
Coming from the commercial industry, I do not change needles for different types of embroidery. That would make production very time-consuming. Instead, I mainly change needles when they break and don’t use a specific type of needle to embroider FSL. That being said, I don’t think I’d be the right person to ask for that question.
In regards to which lace designs you could use for borders and corners, we have dozens of options for you to choose from! This really comes down to personal preference and the project you’re looking to create 🙂 Here’s a link to our lace designs if you’d like to take a look: https://www.digitizingmadeeasy.com/product-category/embroidery-designs/freestanding-lace/
Happy stitching and thanks for commenting!
Good afternoon John,
Thank you so much for answering my questions. First of all, I would like to apologize for not reaching back out to you sooner. Also, after I sent my first post I realized soon afterward that I did know what dissolve away mesh was. Which of your vintage lace would you recommend that I would be able to use with a corner? If you would like for me to send you over a photo of the project that I am working on, I would be more than happy too. Please just let me know how to attach to my next post.
Still not sure of how to do continuous lace on a garment. Can it be done without software? How are panels joined? Do you have a video on U tube?
Hi Lucha, they can be joined by software, or high-end machine with camera “Brother” or print templates and then line them up manually.