Cutwork embroidery can seem intimidating, but is it?
Not when you have the right tools, information, and easy step-by-step tutorials!

Keep reading to find out everything you need to know to create your own cutwork, including the basics of the cutwork process and certain tools to perfect this technique.
Cutwork Embroidery
Cutwork involves freestanding embroidery that is sewn onto fabric. Depending on your design and the project look you desire, cutwork designs can be stitched surrounded by fabric, or it can be half on your fabric and half freestanding.
Cutwork embroidery designs
Cutwork embroidery designs are specifically created for cutwork. These designs involve specific steps to aid with the process. First, they will include a cut line. This will give you an outline of where you’ll cut for your freestanding embroidery to be visible. You will cut inside the sewn lines. If your stabilizer has been hooped with your fabric DO NOT cut your stabilizer, only your fabric. Next, another embroidery file will stitch. It will line up perfectly with where you cut your fabric. This will be your selected embroidery design and should stitch and look like a cutwork design.

Please note: if you wish to use the cutwork technique, only use designs that have been digitized specifically for the cutwork process. To view our Embroidery Legacy cutwork designs, click here.
Cutwork embroidery stabilizer
You don’t always realize how important stabilizer is until you’re doing cutwork! It’s also crucial to make sure you’re using the right stabilizer. If you used cutaway stabilizer for any embroidery cutwork project, you would spend way too much time with your scissors trying to get it out of the design. As the point of cutwork is to have freestanding embroidery, you want nothing left behind or shown in your embroidery. Using wash away stabilizer is a MUST in this technique. Getting rid of your stabilizer shadowing through is as easy as rinsing your design in warm water.
Note: I would suggest first doing a test with your wash away stabilizer as all household water is different. If warm water isn’t removing the stabilizer, try adding a tiny bit of fabric softener or hair conditioner.
To find out more about stabilizers, check out our Complete Guide to Machine Embroidery Stabilizers by clicking here.
Using wash away stabilizer in cutwork embroidery is a must!
Cutwork embroidery fabrics
The fabrics you use in your cutwork projects can have an impact on your results. If you use a fabric with too high or too low density, it can cause too much movement or cause your design to stitch out poorly. I suggest using cotton materials but make sure your item is washed before to ensure it will not shrink after you’ve stitched on it.
Want to find out more about fabrics used in embroidery? Check out The 3 Main Fabric Categories Used in Machine Embroidery by clicking here.
Threads for cutwork embroidery
Although many different thread types are making it hard to determine what’s best to use for cutwork, I suggest using Rayon thread. Rayon lays flatter, has a high sheen, and offers many different color selections. It can perform well in high-speed stitching and has a softer feel, great for intricate embroidery. I would not suggest using Poly. Although it has a higher breaking point, Poly’s synthetic nature causes it to become a little spongy in feel and appearance when the stabilizer dissolves.
When stitching out cutwork, use Rayon thread for a softer feel and perfect end result appearance. Want to learn more about embroidery thread? Check out our Types of Machine Embroidery Threads and When To Use Them article by clicking here.
Scissors for cutwork embroidery
You can use any embroidery scissor, but I highly suggest using 6-inch double-edge curved scissor when it comes to cutwork embroidery. The reason is because of how they’re designed. The handle is curved, which allows you to get in and under your fabric, similar to a shovel. The blade end of the scissor points upwards; this is so the blade doesn’t cut anything you don’t want cut, such as the bottom part of the stabilizer or fabric. This end also helps with precision and intricate detail, which is essential when creating cutwork in embroidery.

6-inch double-edged curved scissors are engineered for precise cutting, essential for cutwork embroidery.
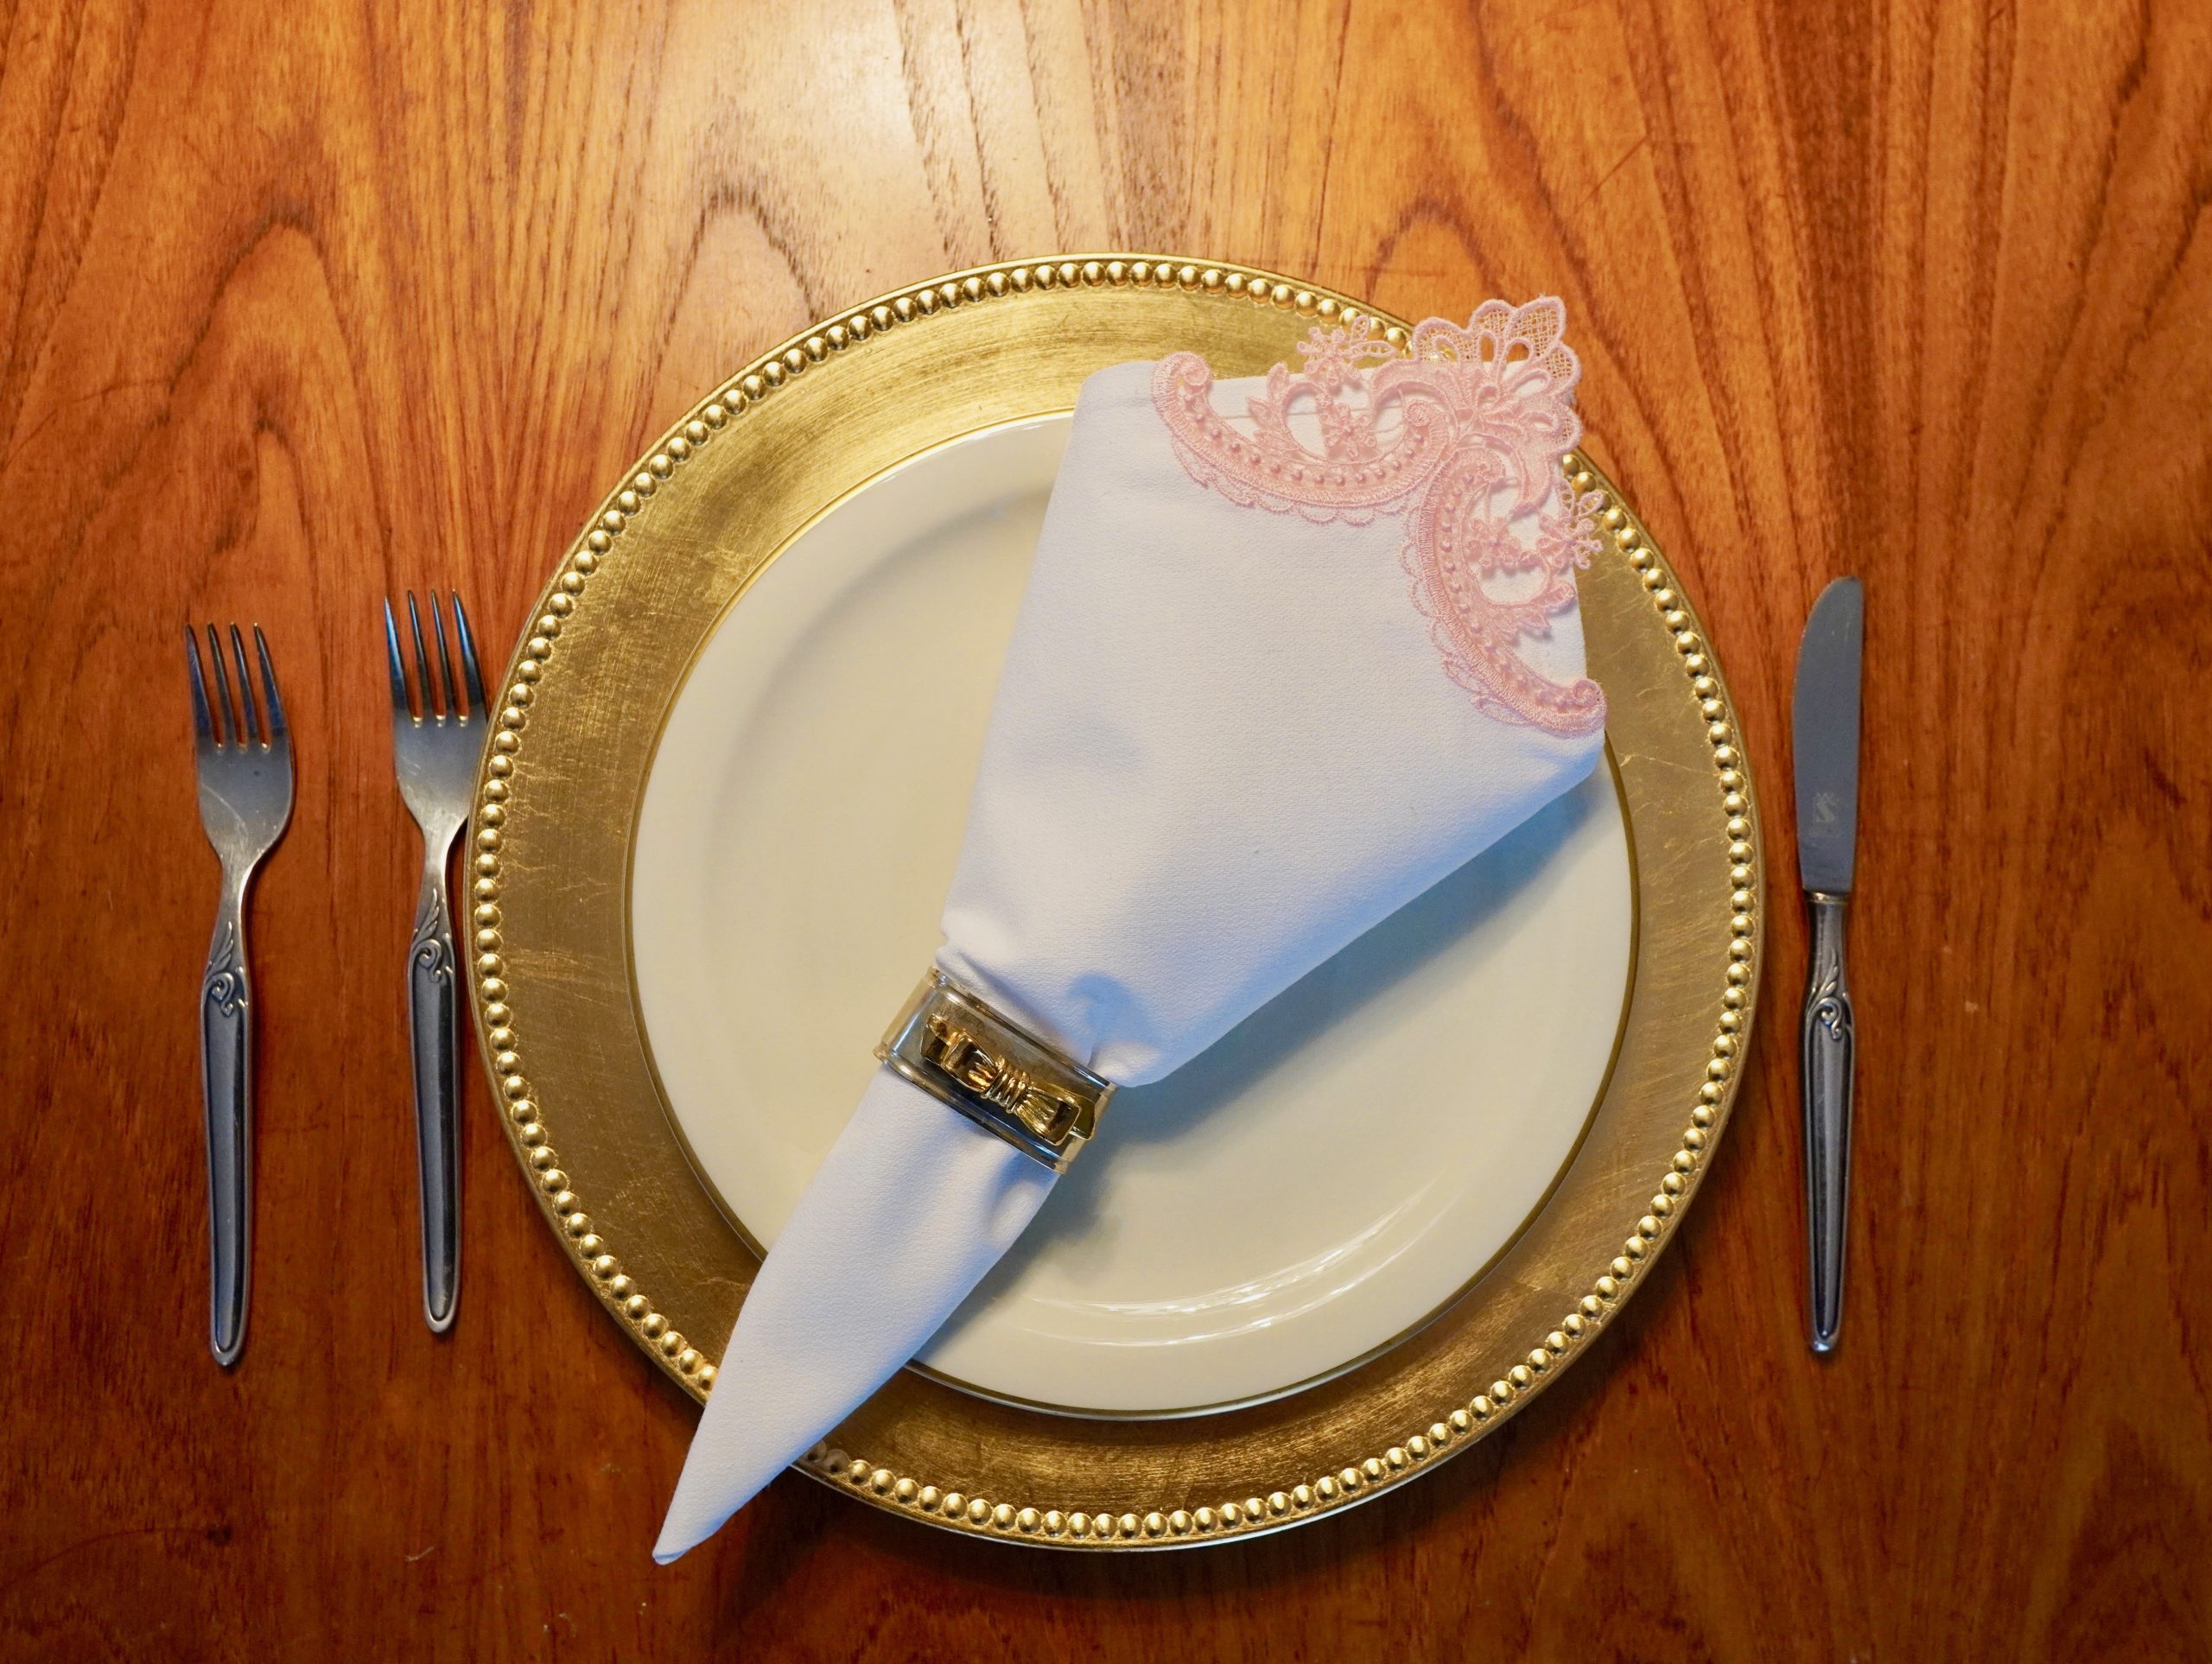
Why Create This DIY Cutwork Napkin
You’ve seen those beautiful kitchen tablecloths or stylish blouses with lace cutwork in them and thought, I want to do that! Well, this is a great project to help you discover the simplicity of cutwork steps while having fun, to produce something so intricate and elegant. It’s always scary trying out a new embroidery technique, but once you have a feel for it, you’ll be hooked! Be prepared to incorporate cutwork to everything around you. (Sorry, not sorry)
These DIY cutwork napkins are the perfect decor for your next gathering. They’re a great conversation starter, and people will be impressed after you mention, “I made that!”. Be prepared for the “Do you think you can make me some?” comments. They also make great gifts! Whether for Christmas, birthdays, weddings, or even house warming gifts, they’ll always be appreciated.
Not only are these cutwork lace napkins functional, but they’re elegant, and you can also personalize them to any color or fabric of your choice. Make different styles for different occasions. Using a red fabric with green thread would be perfect for your Christmas dinner decor; use white fabric with blue thread when you have company over to match your plates. Your options are endless, and you can set a different feel for your room as you choose.
How To Make Your Own Cutwork Lace Napkin
Follow the tutorial instructions listed below to create your very own beautiful cutwork lace napkin! The theory application in this tutorial can be applied to other cutwork embroidery designs. You got this!
More of a visual learner? We’ve got you covered. Watch our Youtube tutorial here:
Supplies required for this cutwork corner napkin:
- A napkin (or hanky or tablecloth -whatever project you are adding the cutwork corner onto)
- Wet N Gone stabilizer
- Rayon thread and matching prewound colored bobbin
- 5×7 or 8×8 hoop
- Scissors (we recommend 6″ double-curved scissors)
- Cutwork lace napkin embroidery design

Cutwork lace napkin tutorial
Step 1: Load your cutwork lace napkin embroidery design file into your embroidery machine.

Step 2: Hoop your Wet N Gone stabilizer and place your hoop into your machine.
Make sure you have the same color bobbin thread as your top thread.
Run the single “long” running stitch -you’re going to use this stitch as a placement cut.

Step 3: Tape the tip of your napkin in place onto the stabilizer.

Step 4: Run the tack-down stitch. After it’s finished stitching, remove the hoop from the machine.
Cut the tip of the fabric away, DO NOT cut the stabilizer during the process.
Carefully remove the “long” placement stitch from the stabilizer.

Step 5: Place your hoop back in the machine.
Run the zig-zag stitch on the borders of the fabric to secure the raw edge of your napkin.

Step 6: Continue to run the lace design.

Step 7: Remove the hoop from the machine, and then remove the napkin from the hoop.
Cut any excess stabilizer around the design. Put the lace design into a bowl of hot water and let the stabilizer dissolve. Pat dry with a towel.

Step 8: Congratulations on your completed cutwork lace napkin project!

Conclusion: Creating Cutwork Is Easy & Fun
Hopefully, this tutorial has helped you better understand a bit more about cutwork embroidery. Although the end result can look intimidating, the process is easier than you think. Remember to have fun learning this new embroidery technique. If you haven’t already, go try stitching out your cutwork design! Let me know if this tutorial helped or if you have any questions below!
P.S. Want to try stitching 11 Embroidery Legacy embroidery designs for free? Download our free Embroidery Legacy Design Kit today! Experience the difference quality digitizing makes with these smooth, stunning designs.


Leave A Comment